
A major part of GridView functionality is the ability to group grid data by columns, or "categories." Within a GridView panel there are a variety of ways to group and ungroup your data.
Grouping
There are three ways to set a grouping in a GridView panel:
-
-
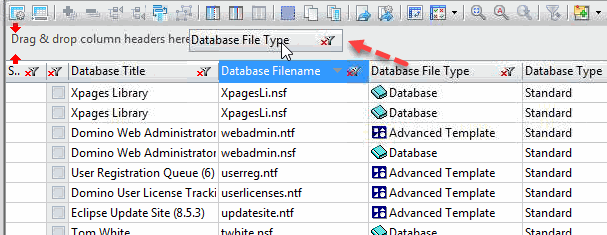
Drag the column header to the group zone area. Group hierarchy position will be indicated by red arrows. When grouping more than one column, you can drag the header directly to the desired hierarchy position.
-
-
-
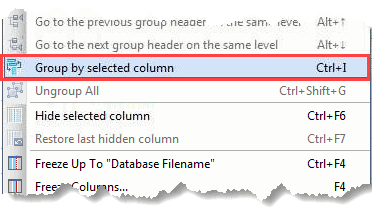
Click the 'Group grid data by selected column' toolbar button

TIP
When this function is used, the grouped column will remain in memory until another column is selected (the toolbar button will be highlighted as an indication) allowing you to toggle this grouping on and off. This is useful for "testing" a grouping.
-
Use the Ctrl + I key command.
-
Performing the reverse action on groupings already set will unset the grouping and arrange the grid data accordingly.
When the drag-and-drop method is used, you can return the column header to any position you choose.

|
NOTE |
You can also hide the column directly by dragging the column to the trashcan on right-hand side of the group zone |
|---|

Group Hierarchy
When setting multiple groupings, the order in which the groupings are set in the group zone determines the way your data will be grouped. The group hierarchy is shown visually in the group zone, with the highest-level group being the farthest to the left, and is also reflected in the grid.

As shown in the example above, the group order is as follows: Database File Type, Logical size, and Database Type.
Position in the grouping hierarchy can be set directly upon dragging a column header to the group zone, by dragging column headers already in the group zone to a new position, or by changing the column's Group Level in the Grid Manager.

The screenshot above shows the corresponding Group Level in the Grid Manager.
Unsetting Multiple Groupings
In addition to the simple drag-and-drop method of unsetting single groupings, GridView panels also offer options, and at varying strengths, to unset more than one grouping at the same time:
-
-
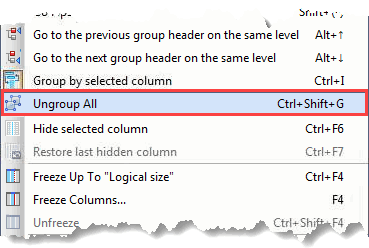
Clicking the 'Ungroup All' toolbar button

-
-
-
Clicking the 'Unset all Grouping and Sorting' toolbar button

-

-
-
Clicking the 'Restore Grid to its original order' toolbar button

-

Group Totals
Beyond the ability to arrange your grid data by category, you can bring additional clarity to your data set by activating the group total function for the categories that you choose.
This can be done by selecting the group total type in the 'Group Totals' dropdown menu in the Grid Manager.

Once a total type is selected, it will be displayed on the category header within the column it is set on. You may change the column position without affecting the calculation.
The available options for setting a Group Total will vary depending on the type and status of the column. The following table shows what choices are available for the different column types.
Group Total Options Available for each Column Type:
|
Text |
Number |
Time/Date |
Checkbox |
|---|---|---|---|
|
Count |
Sum |
Minimum |
Count Checked Only |
|
Count but Exclude Empty Cells |
Average |
Maximum |
Count Unchecked Only |

|
Minimum |
Delta |
Count |
|
|
Maximum |
Count |
|
|
|
Delta |
|
|
|
|
Count |
|
|
|
|
Count but Exclude Empty Cells |
|
|
The various Group Total selections function as follows:
-
Count: This will calculate the amount of entries within the category.
-
Count but Exclude Empty Cells: This will calculate the amount of entries within the category minus the number of cells that are empty either because their information is not yet loaded or the value doesn't exist.
-
Sum: This calculates the sum of the cells within a given category.
-
Average: This calculates the mean value for all the cells within the category.
-
Minimum: This will display the category's minimum cell value.
-
Maximum: This will display the category's maximum cell value.
-
Delta: This will calculate the difference between the minimum and maximum cell values.
-
Count Unchecked Only: This count only considers "Unchecked" values.
-
Count Checked Only: This count only considers "Checked" values.