Bulk changes in 2 easy steps
sapio365 is the fastest way to make changes on the fly…
Changes you make with sapio365 can be reviewed before you save them. This can be especially helpful when making a large number of changes to your tenant all at once.
Apply and preview changes in the grid
When you are creating new entries, deleting them or updating their properties, and you click “Apply”, changes are displayed in the grid with a light green background.
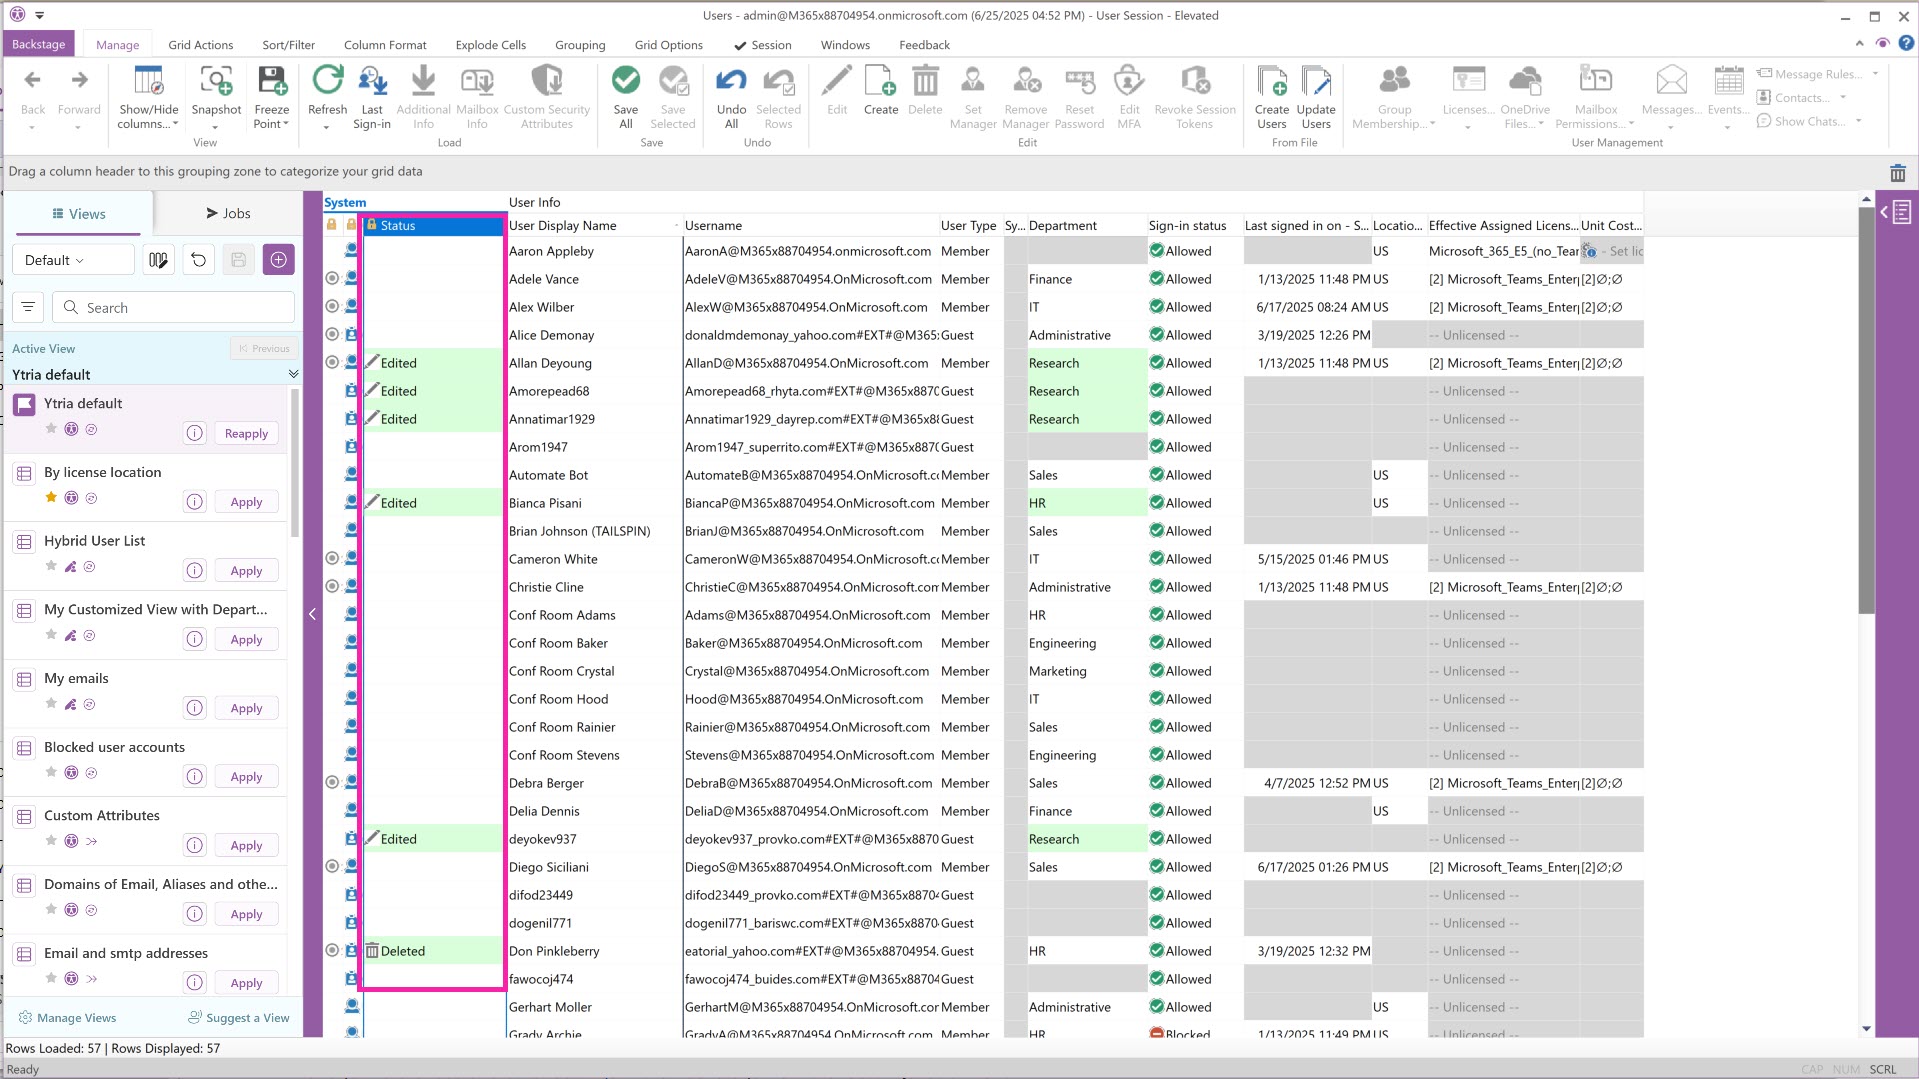
Moreover, you will see an icon in the Status column indicating what will happen when you click “Save” and commit the changes:
A pencil icon indicates an entry for which a value will be updated.
A star icon indicates an entry that will be newly created.
A trash icon indicates an entry that will be deleted.

1 - Review and verify your changes
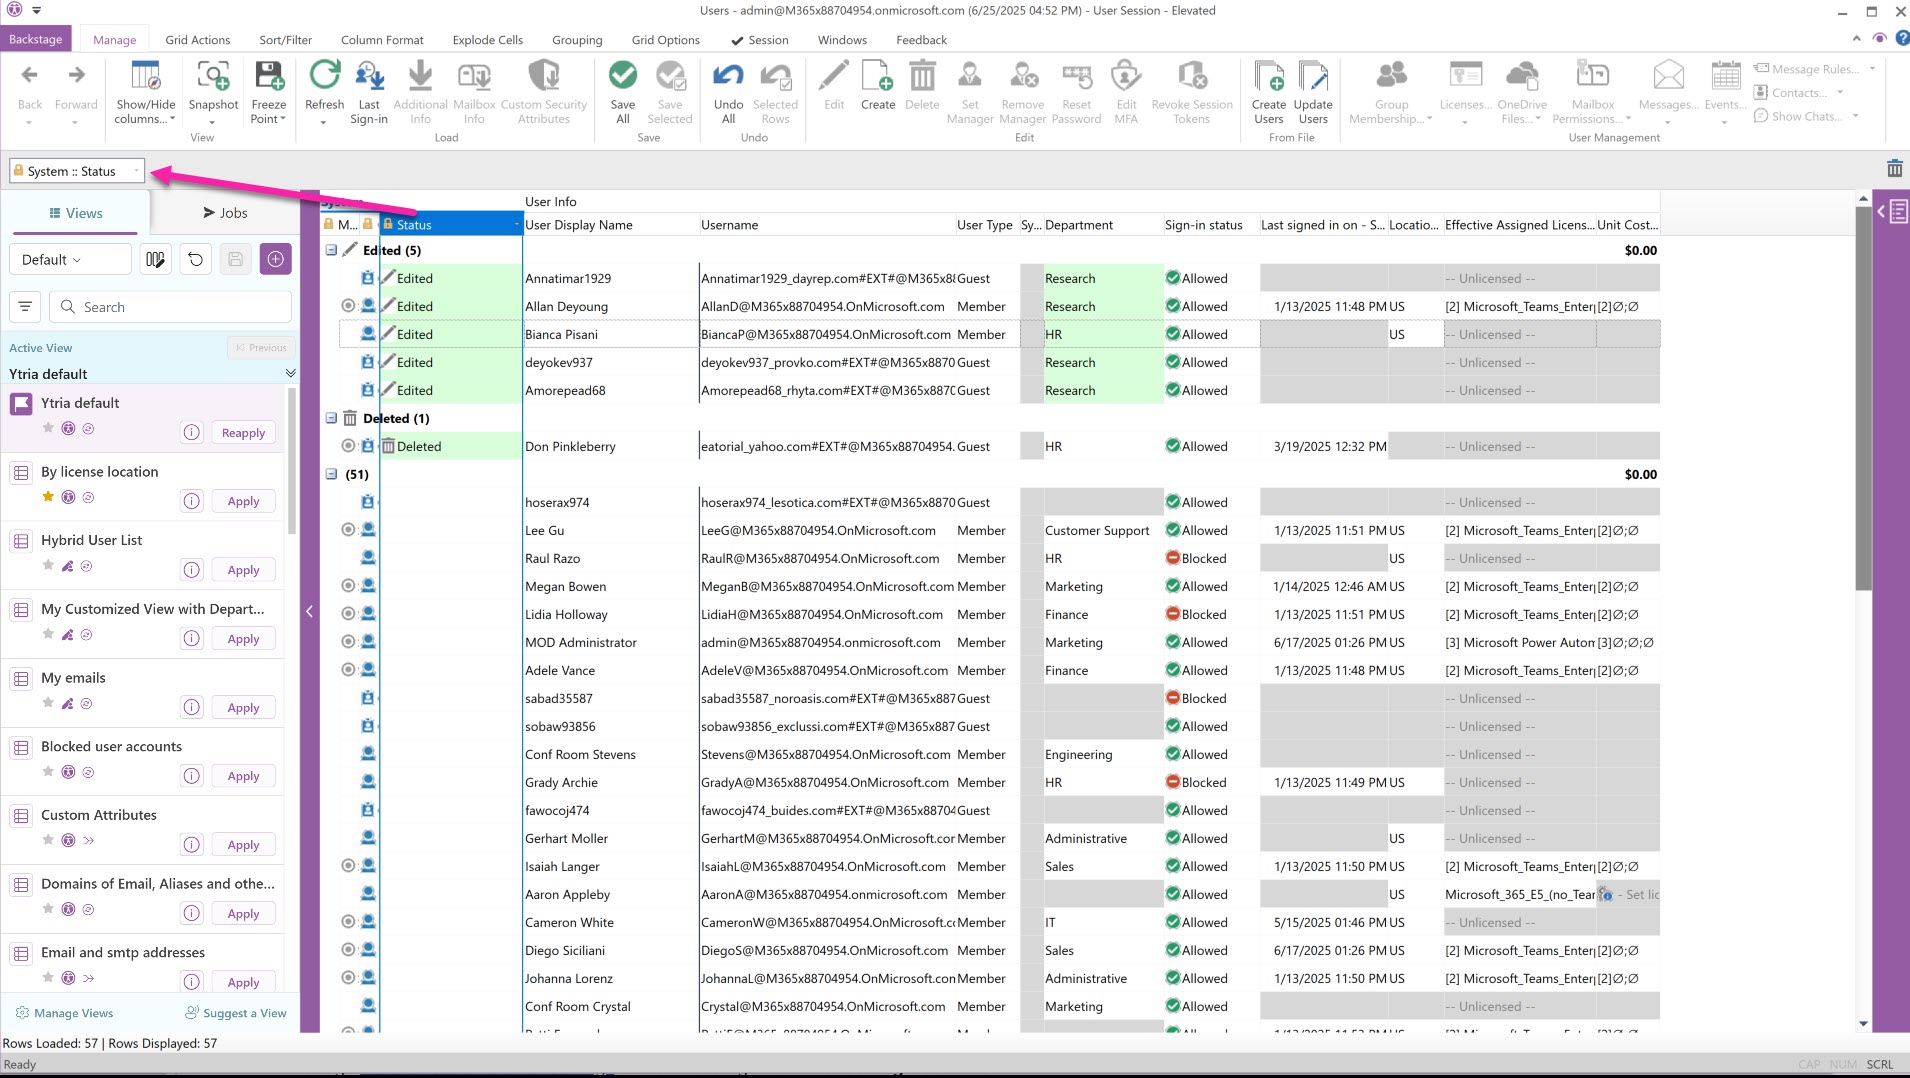
Grouping by the Status column is a great way to gather together all your unsaved changes for a final check. Especially if you have a large number of pending modifications.
Simply drag the column header into the grouping zone above it.
Apply a value filter on the Status column
Optionally, you can sort the column or you can apply a value filter to only display these entries in the grid.
Warning: if you save or undo the changes, affected entries will get filtered out since it’s a dynamic filter.

2 - Save or Undo changes
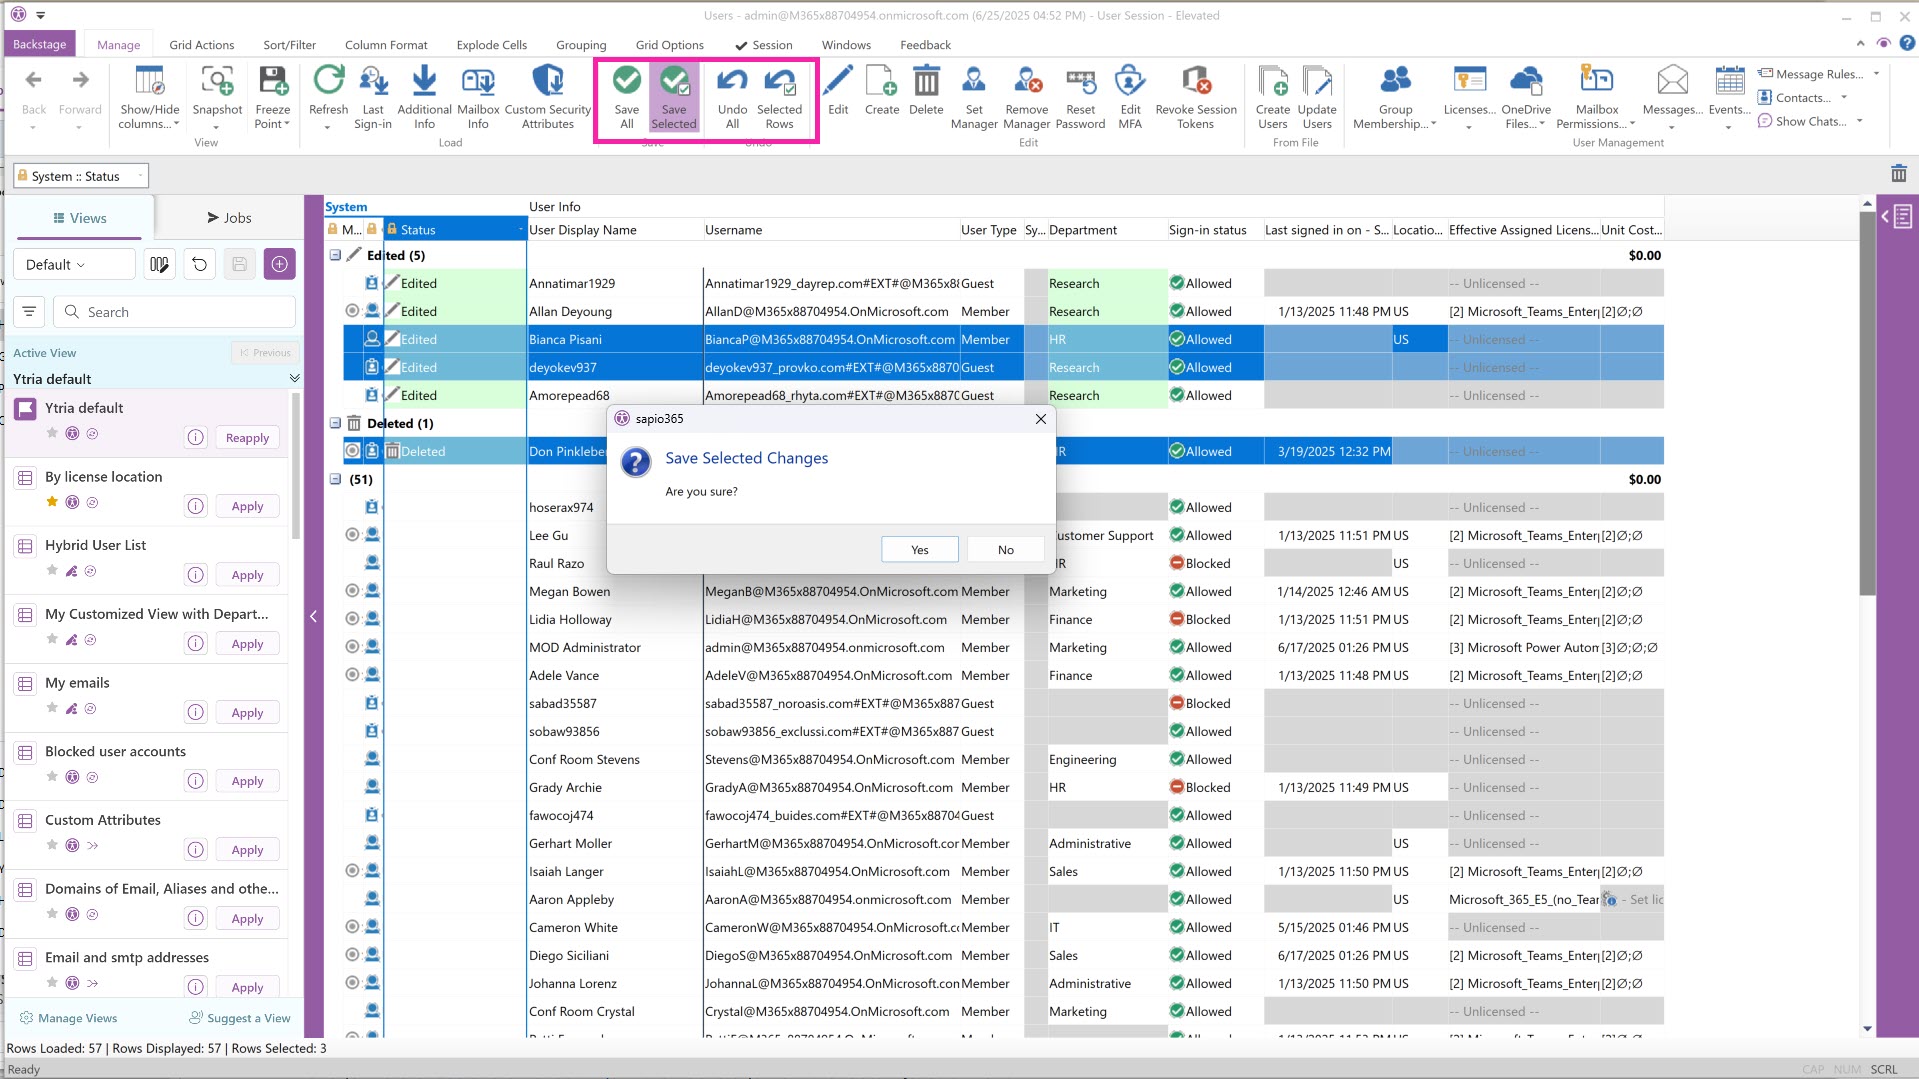
At this point you can decide to either save your changes, or undo them.
Note that the Undo buttons cannot undo changes that have already been saved to the server.
You will have the option to:
Save All
Save Selected
Undo ALL
(Undo) Selected Rows
Use “Save Selected” as an extra precaution
If you’re processing a large volume of changes, you may want to visually select entries and save them in batches.

