
After downloading and registering sapio365, the first thing you need to is to connect sapio365 to your tenant by creating a new Session.
Once you’re connected, you're ready to use sapio365!
If your Microsoft 365 tenant is hybrid and you need to work with data in your local Active Directory (AD), make sure that sapio365 is connected to your local AD.
If you have a National Cloud Deployment (GCC High, DoD or 21Vianet), you’ll need a few additional steps to connect sapio365 to your tenant. Learn more on this page.
The sapio365 Dashboard is your starting point. Learn more about it here.
3 Main Concepts before you use sapio365
sapio365 is different from other tools, including the Microsoft 365 admin portal.
To get yourself comfortable using it, there are 3 major concepts to understand:
1 - Choose what you want to load
You control which data you want to load. sapio365 first retrieves general properties. Sometimes, there are more properties that require you to load extra information for selected entries. For example, loading MFA or OneDrive information on a selection of users. This allows you to limit processing time when all you need is basic information.
2 - Organize your data with filters, groupings and other grid tools
Once you have loaded the data you need, you can isolate entries by sorting or filtering on the properties. Grouping entries by properties can help you identify outliers or it can give you an overall summary of the data. Your custom view can be saved, and it can even be automatically exported and emailed on a recurrent basis using the Quick GridView.
3 - Preview changes before saving them
Any changes you apply to sapio365 grid are first displayed as a preview. This lets you review and validate changes before saving them.
Changes are automatically saved when running certain automated jobs
sapio365 automated jobs are workflows of retrieving, rearranging and updating data.
When you run or schedule automated tasks that make updates (pen icon ![]()
We recommend to try these jobs on test accounts first.
To help you understand these 3 concepts let’s take look at the example of managing users.
1 - See everything in one place
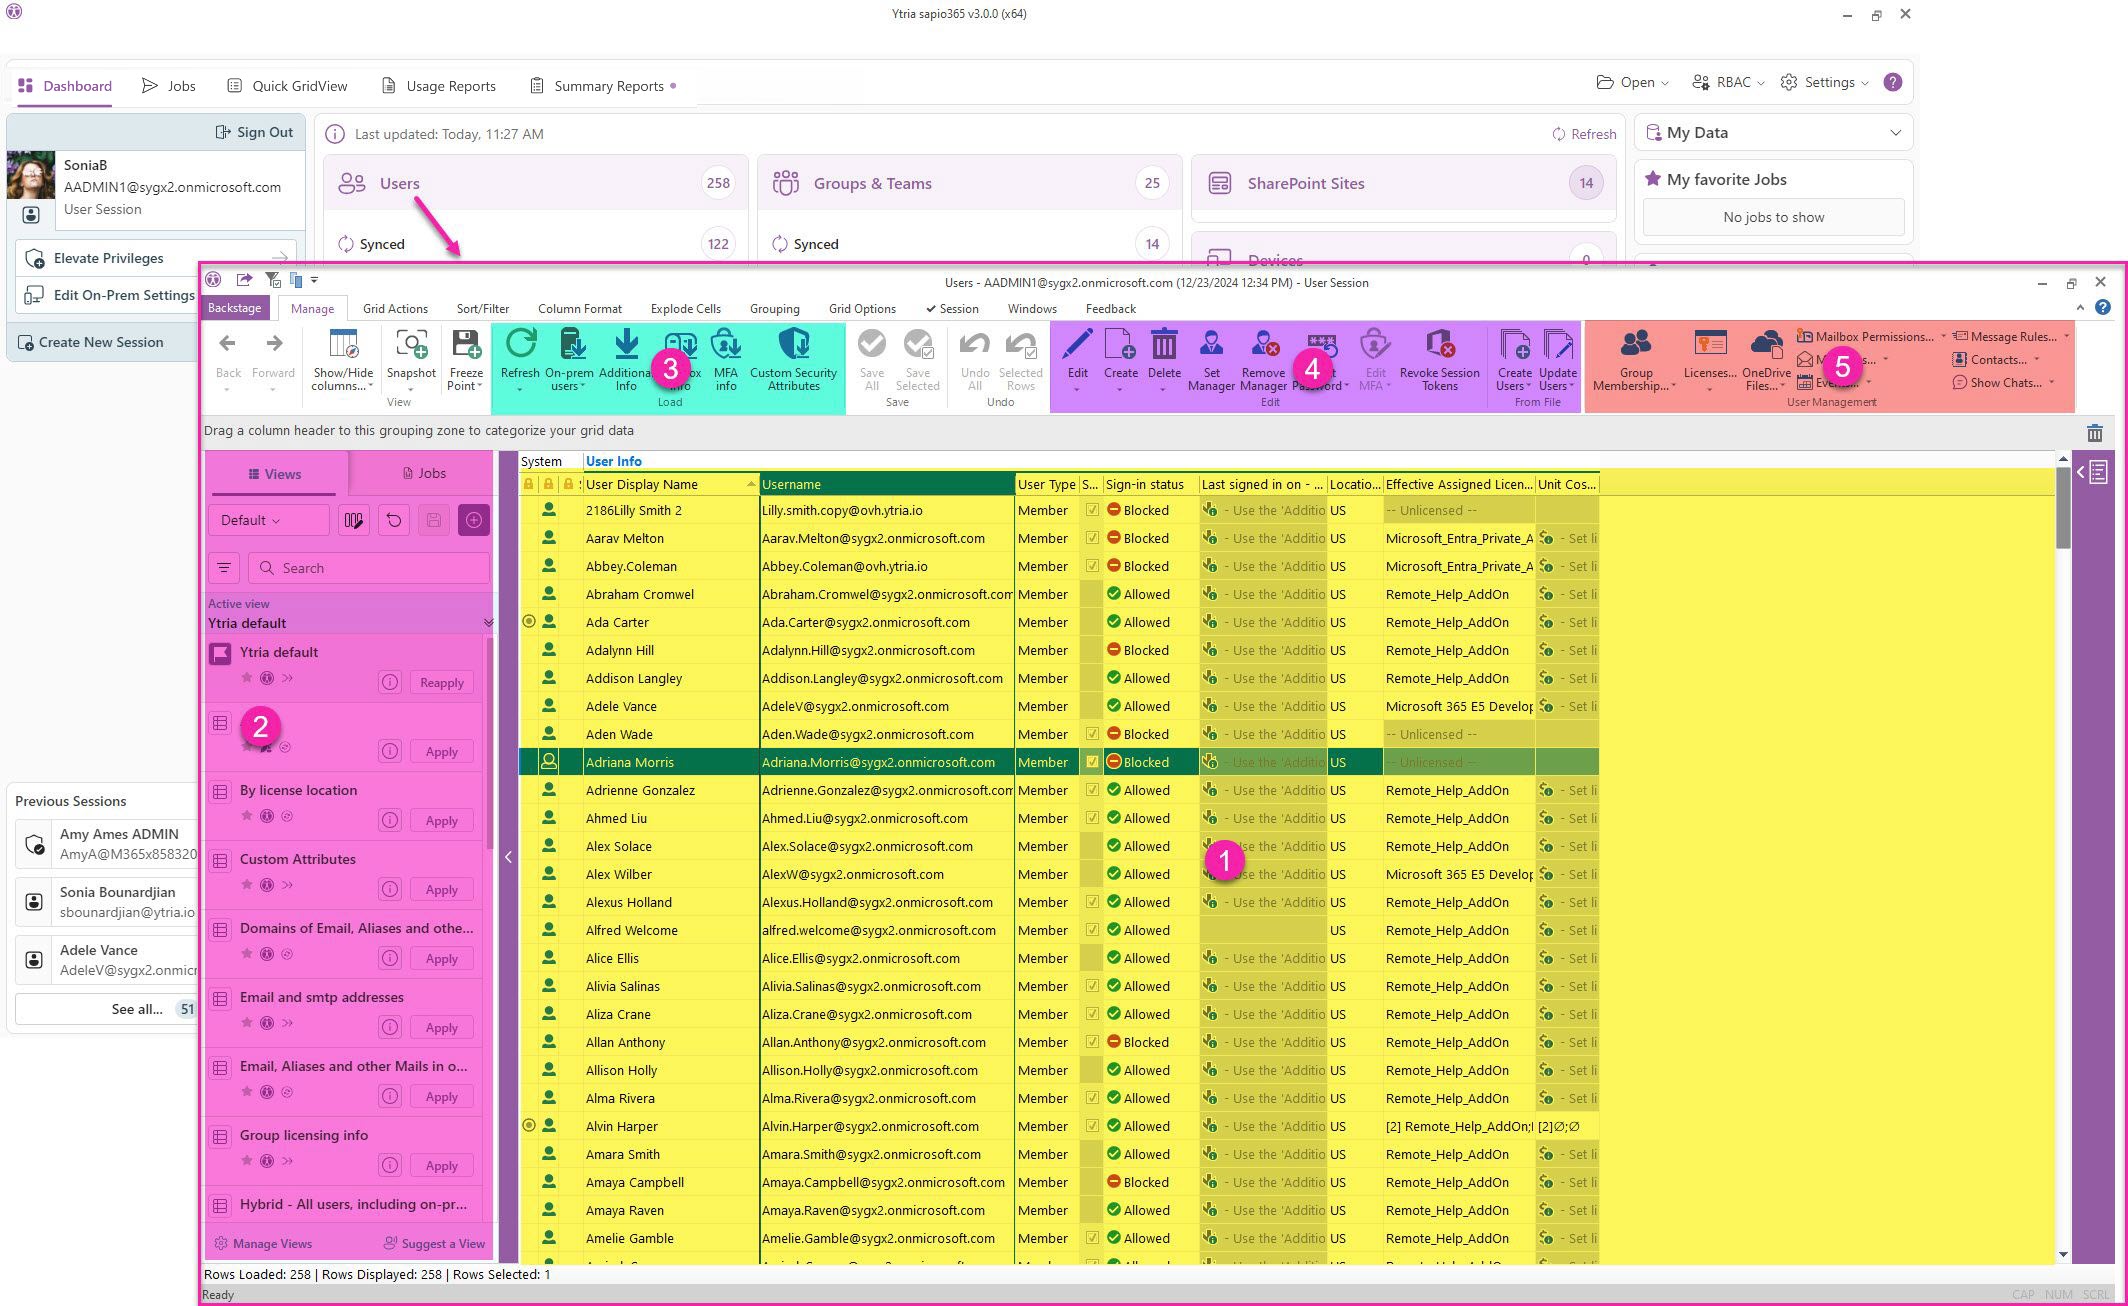
Let's start by looking at your list of user accounts by clicking on 'Users' as shown in the image below. Learn more about what's available to manage users here.
You'll see:
-
A GridView with all your user accounts and some of their properties represented by columns that you can show or hide in the grid.
-
On the left of the GridView, you have access to Views and Jobs.
-
Views are grid configurations that you can apply. You can save your own your custom Views, which you’ll see here.
-
Jobs are automated reports or tasks that can be executed or scheduled based on a selection of users or for the whole tenant.
-
-
Above the GridView is the ribbon. The 'Load' section features of the Manage tab let you retrieve extra information on the entries you select, in this case users.
-
The ‘Edit’ section features let you make changes for the users you select.
-
The ‘User Management’ section features let you retrieve content or relationships of selected users.
Next, an example on how to export a list of users who are blocked from signing into Microsoft 365.
2 - Organize your data or create a custom view
In the ribbon, there are other tabs in the ribbon, highlighted in yellow in the image below, that let you organize your data the way you want to:
-
Export data for a quick report
-
Analyze your data further
-
Isolate entries to update.
Learn more about customizing your GridView data.
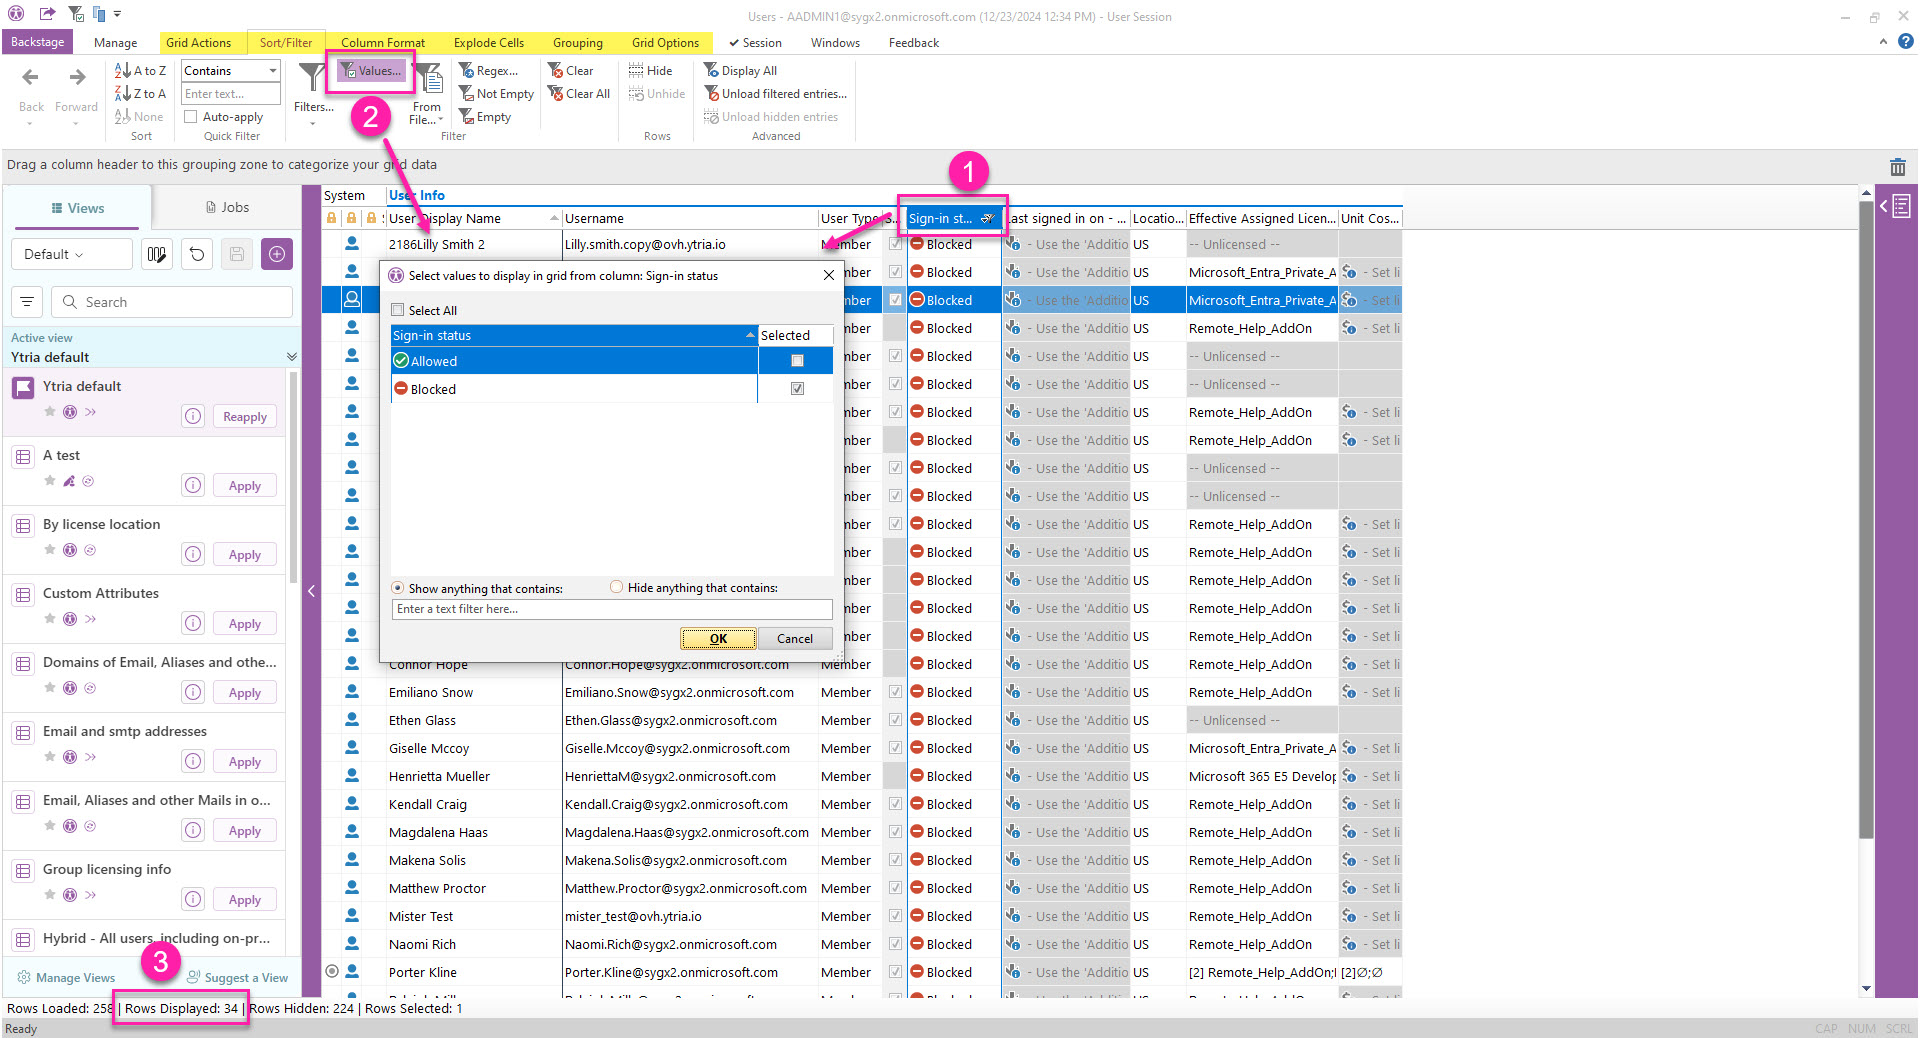
In this example, let’s apply a filter on the property 'Sign-in Status' to only show users who are blocked from signing in:
-
Click on a cell in the column to filter to bring its column into focus. Its column title will be blue.
-
Go to the Sort/Filter tab and click on ‘Values’ to uncheck 'Allowed' value to filter out entries from the column in focus.
-
Note the number of displayed rows at the bottom left of the GridView as a result of applied filters. Columns where filters are applied show a small funnel icon

in the column title.
Apply a filter by right-clicking a column header
Optionally, use the right-click menu from a column title to apply filters, sorting, groupings, formatting and more.
Export GridView data for your report
Select visible rows in the GridView to copy them with the standard CTRL+C shortcut or to export them.
-
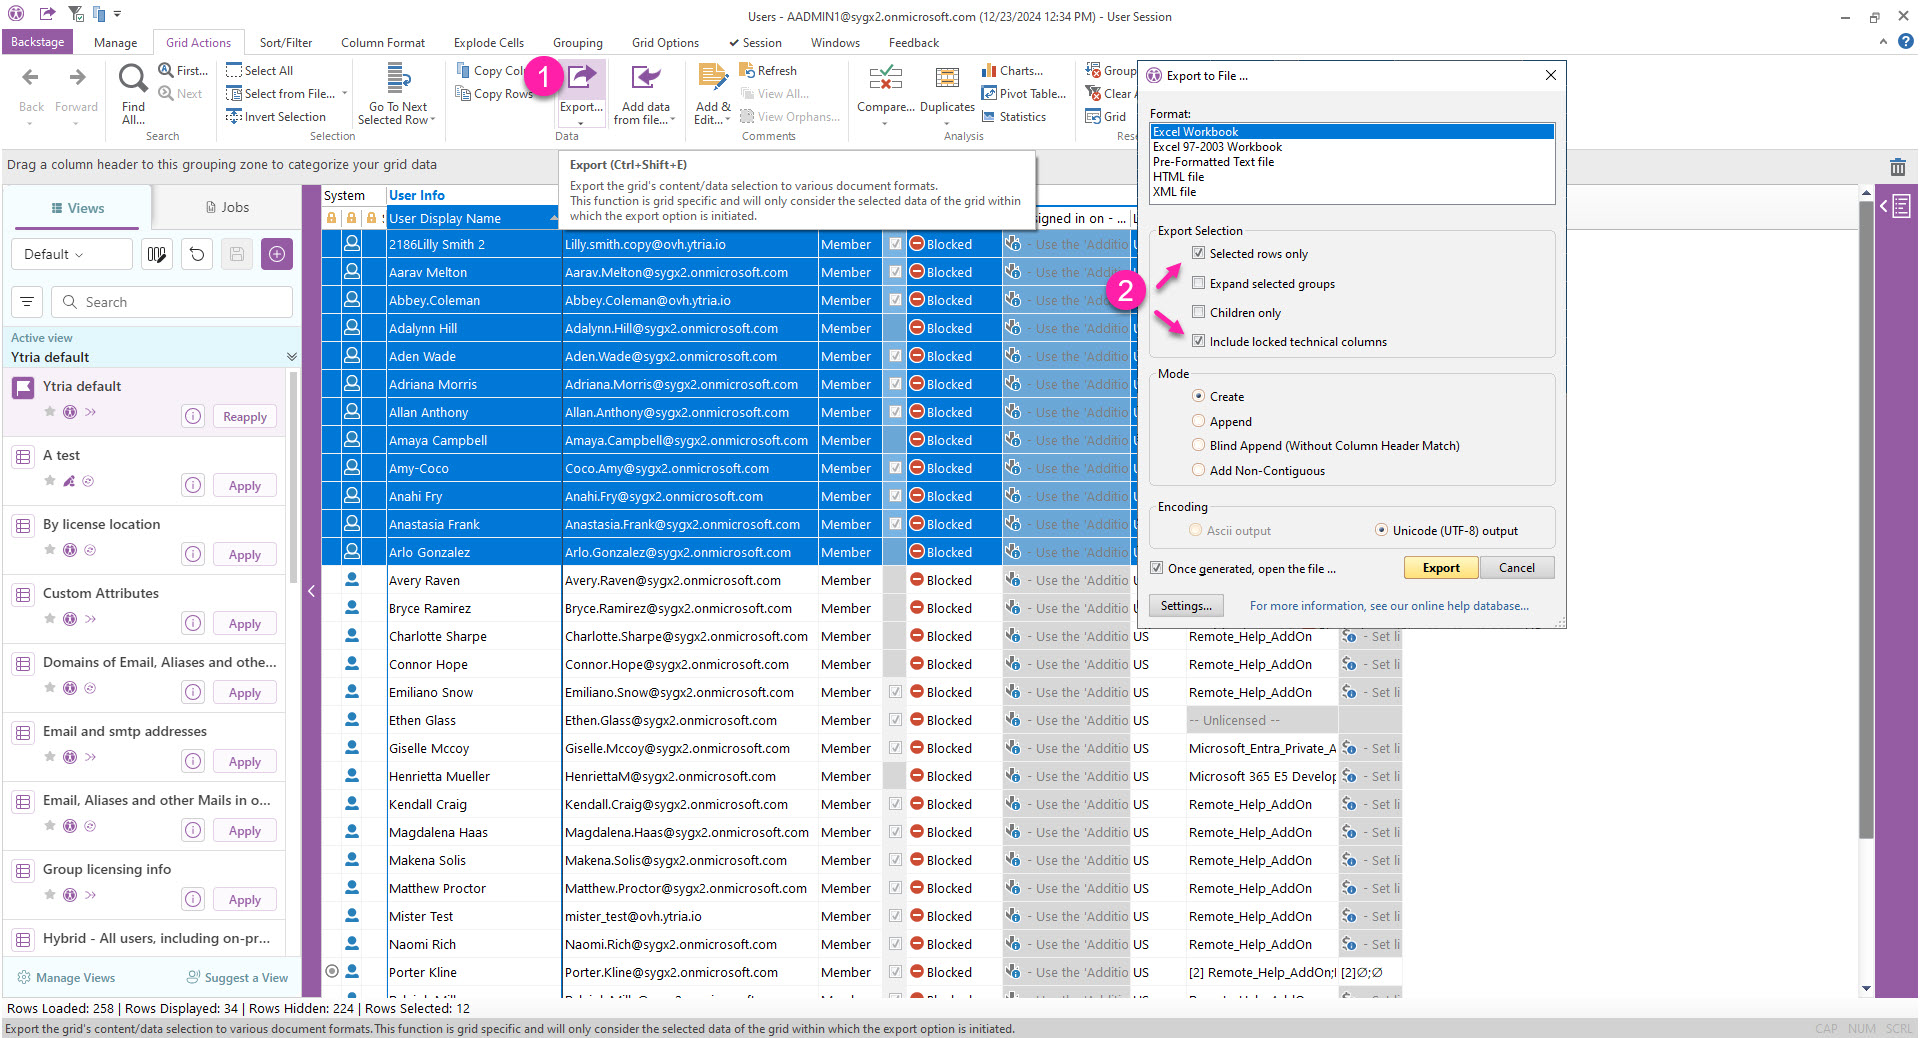
Once you've organized your data, go to the ‘Grid Actions’ tab and click on 'Export'.
-
Choose your export format and unselect some default options to:
-
Export all rows by unchecking ‘Selected rows only’.
-
Omit technical columns ('System' columns with a yellow lock icon in the GridView) from your report by unchecking ‘Include locked technical columns’.
-
Finally, here’s how you can confidently make bulk changes by previewing changes.
3 - Preview changes before saving them
Once you've organized your data to isolate entries, you may find something that needs to be changed.
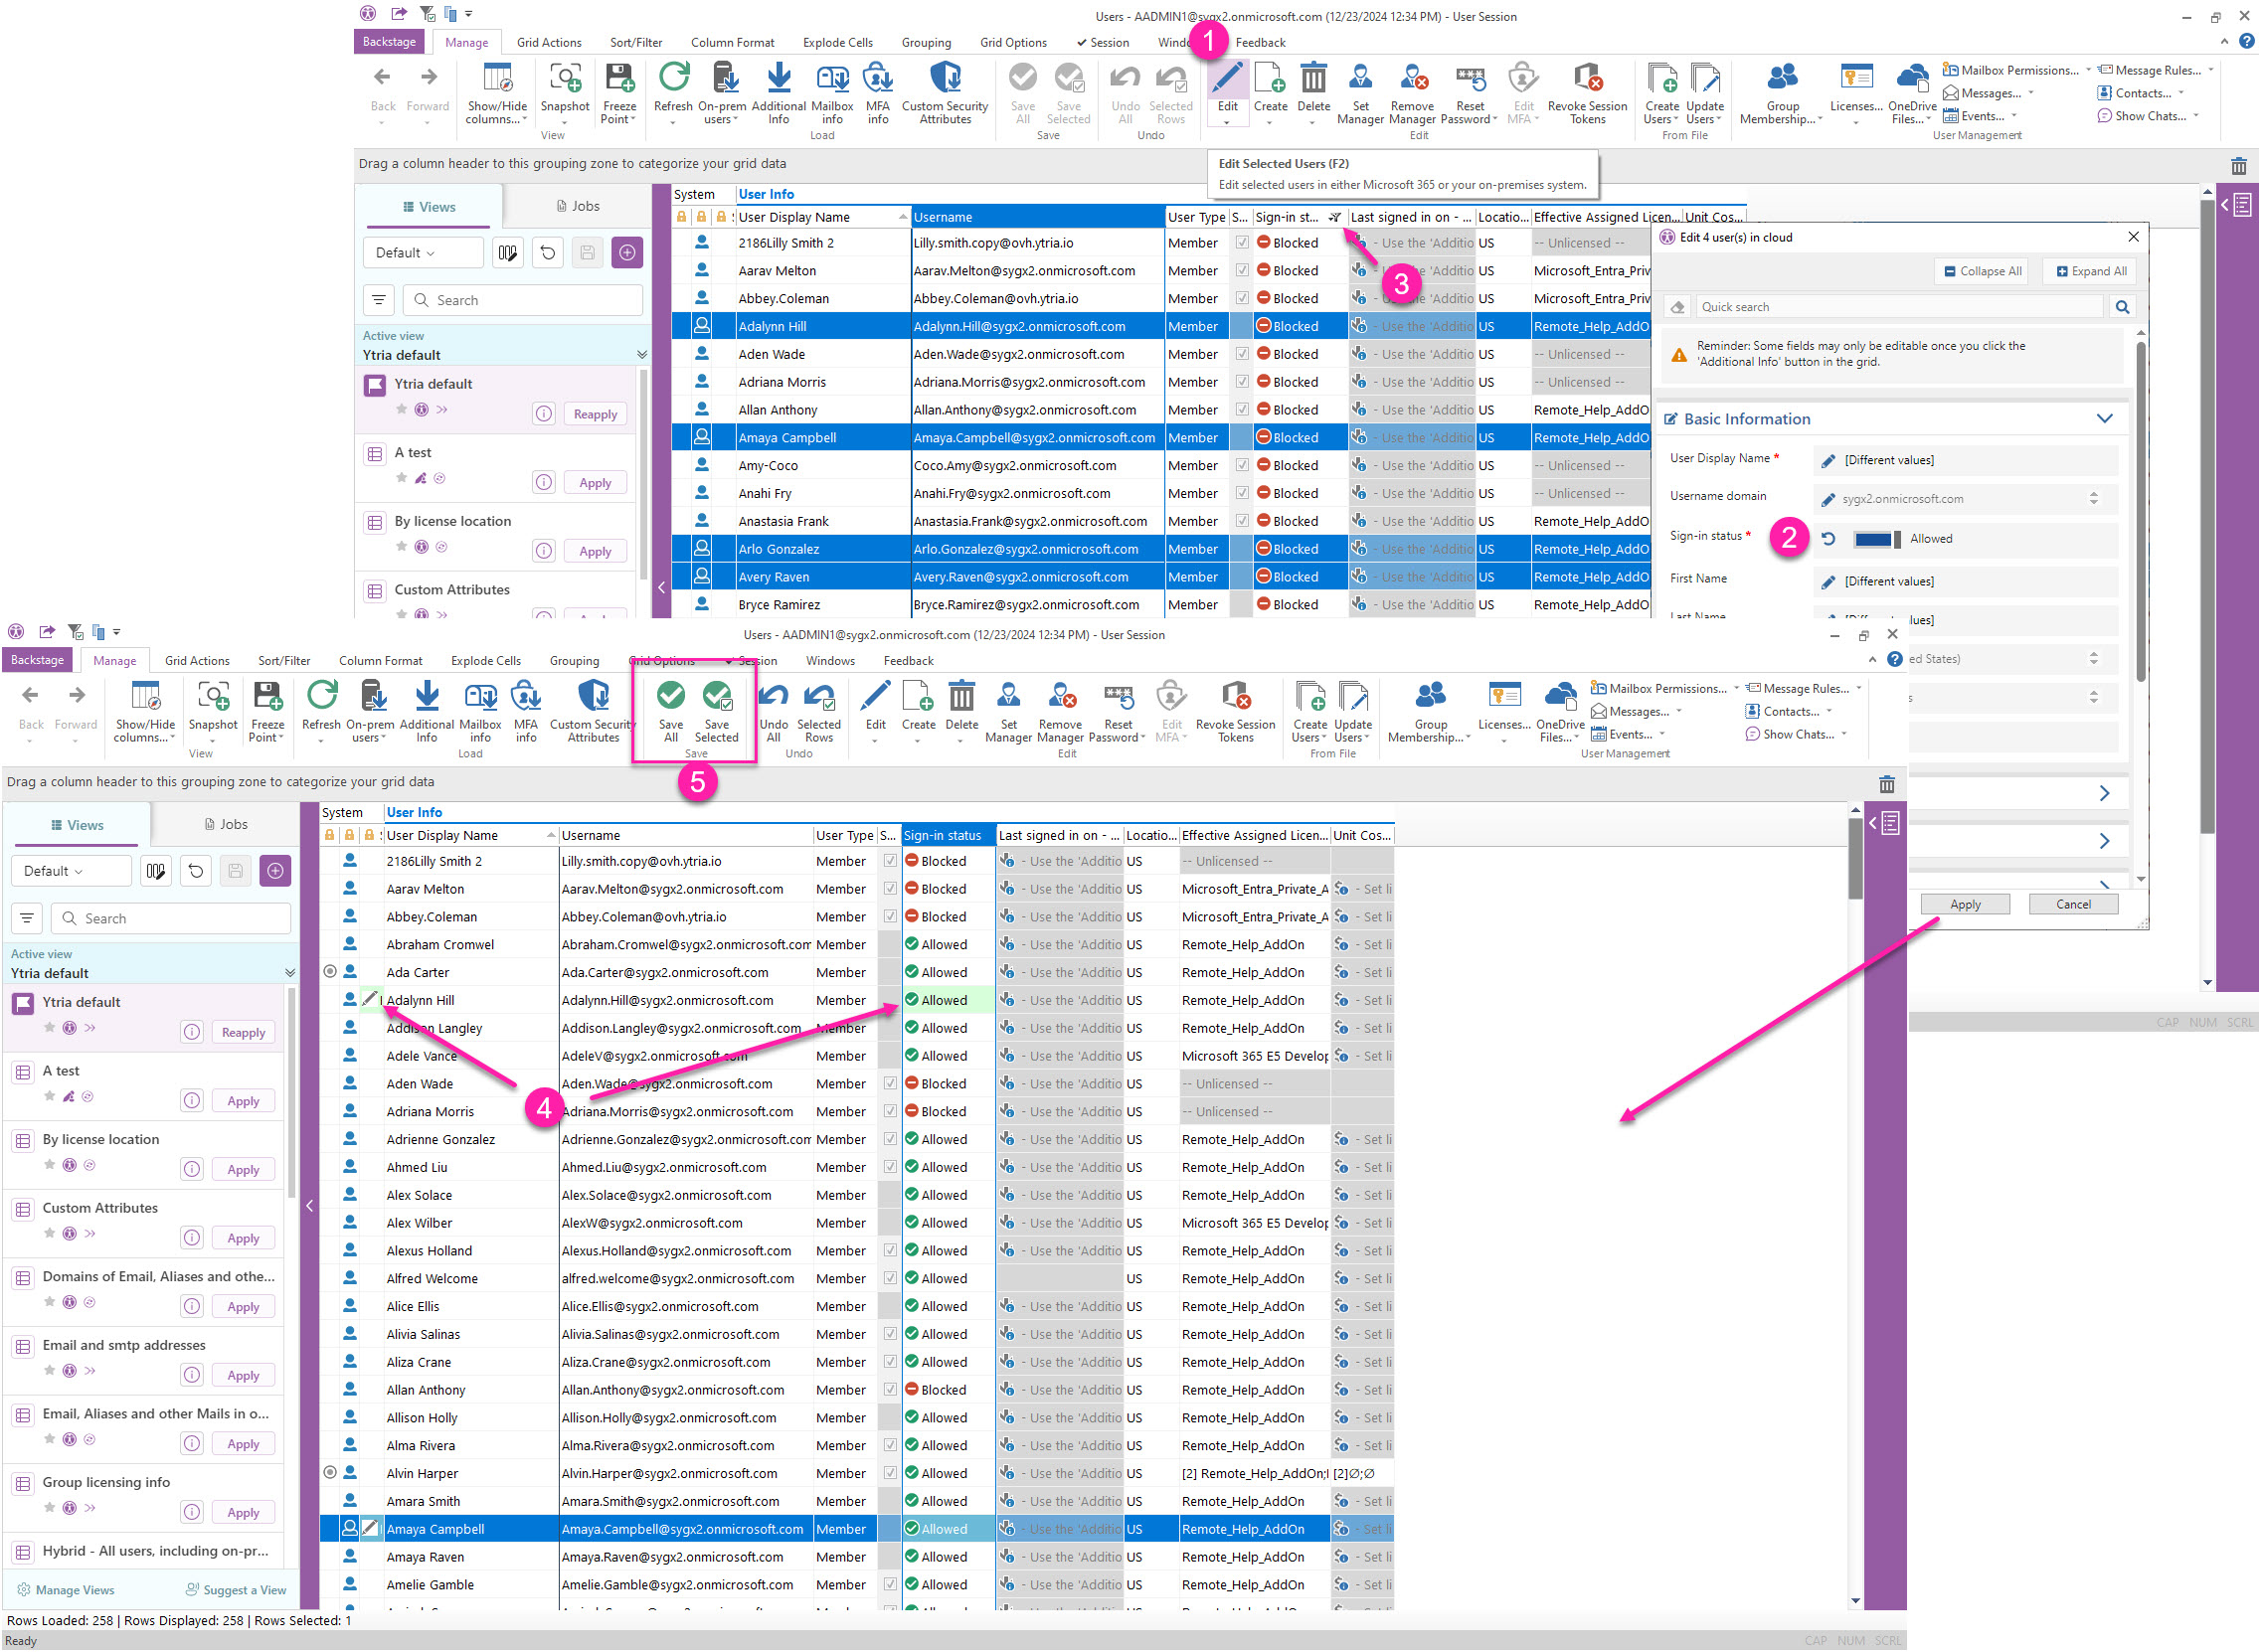
For example, you want to reactivate some accounts by allowing them to sign in.
-
Select the accounts using Shift or CTRL. Go to the ‘Manage’ tab and click 'Edit'.
-
Click on the pencil icon to change the value, and apply.
-
(Optional) If you have any filters applied on the value you are updating, clear them to see affected entries. Filters are dynamic.
-
Review changes by sorting on the status column (click on the column header) where a pencil icon is shown and a preview of the new value is shown in green.
-
Save only selected entries that are set to be updated, or save them all.
Learn more about making changes safely in sapio365.
Other Sections to Explore
Get more details on how to: