
Get the lay of the land here before exploring sapio365!
Click here for a quick video overview
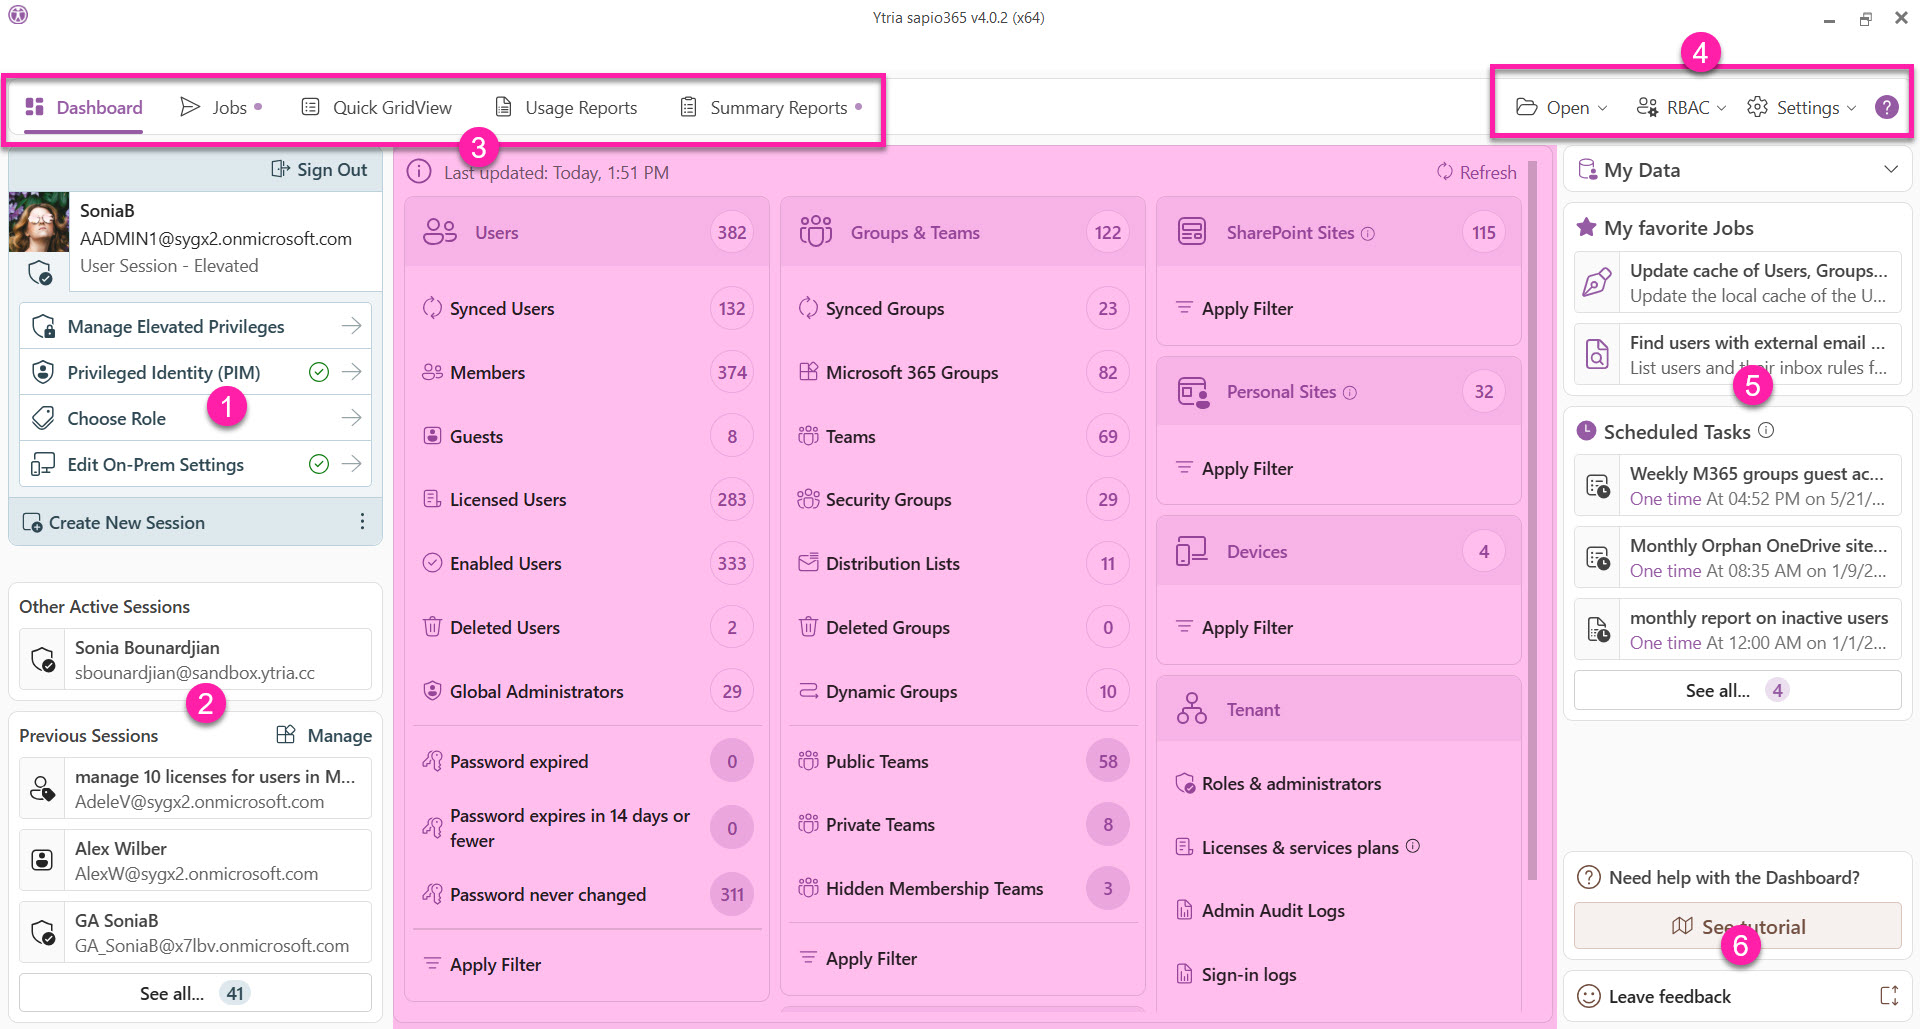
When you launch sapio365 the main window below is your starting point. There are 6 general areas:
-
Information about your current session. Here, you can:
-
Sign out of your session.
-
Elevate your session or manage your elevated session.
-
Set parameters to connect to your on-premises Active Directory.
-
-
Active and previously used sapio365 sessions are listed in the bottom left section.
-
At the top, there are 5 tabs to:
-
Retrieve data from Entra ID and display it in a sapio365 GridView by clicking on an entry point, and see basic data counts in the ‘Dashboard’.
-
View a list of automated reports and tasks that you can run or schedule from 'Jobs'.
-
Run or schedule reports based on available Views in ‘Quick GridView’.
-
Run or schedule reports based on available Usage Report Views in ‘Usage Reports’.
-
Run or schedule PDF summary reports in ‘Summary Reports’.
-
-
A link to My Data and automated tasks that you’ve favorited or scheduled are listed on the right side.
-
The top right section includes shortcuts to:
-
Load a sapio365 Snapshot or Freeze Point from the ‘Open’ sub-menu.
-
Access sapio365 role-based access control and related features in the Backstage from the ‘RBAC’ sub-menu.
-
Manage Preferences and other settings in the Backstage from the ‘Settings’ sub-menu.
-
-
The bottom right section includes links to tutorial videos and a button to directly send your questions and feedback about using sapio365.