Quick GridView
The quickest way to get information using sapio365
The Quick GridView in the main window of sapio365 is an automated linear process of loading data and applying Views.
It lets you:
Get to your data quicker by skipping clicking on the entry points in the Dashboard.
Create shortcuts to your custom Views.
Schedule reports based on Views.
Not sure where to start?
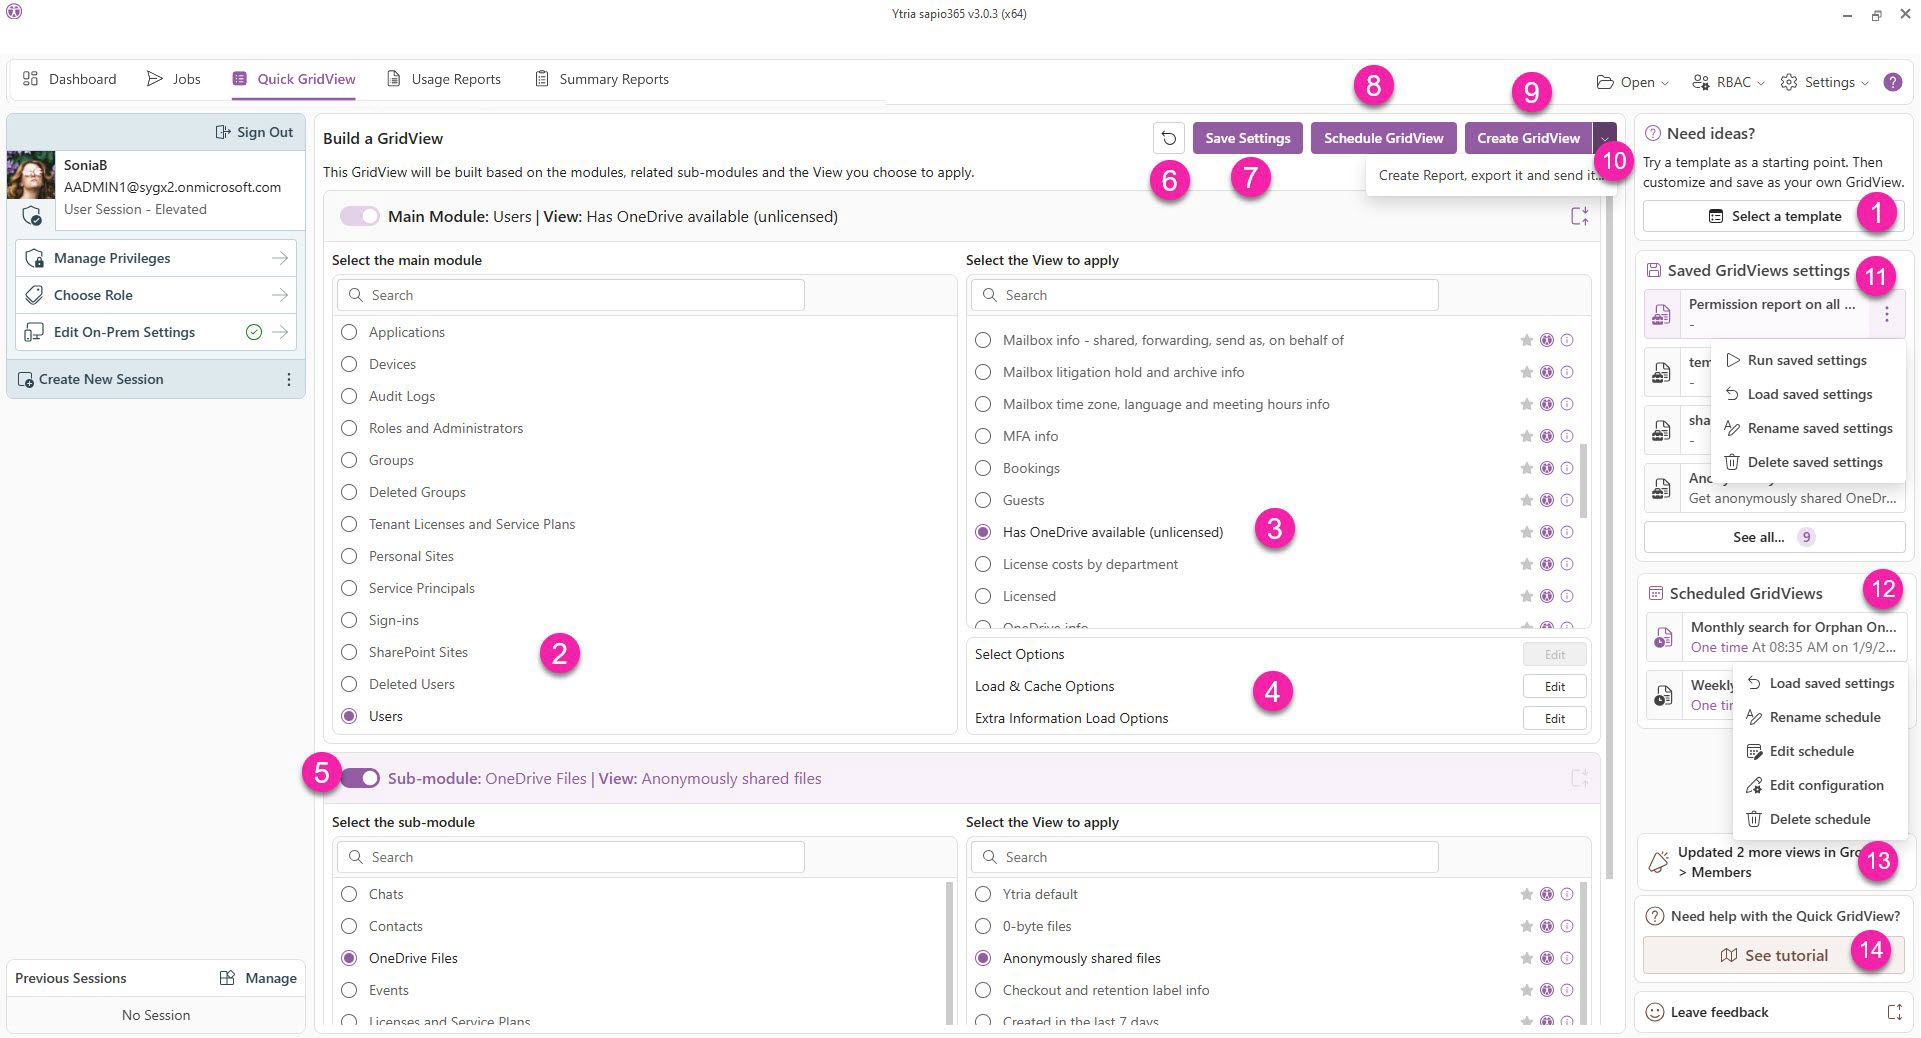
Select a template (#1 in image below).

Create a GridView
Select a template for example Quick GridView setups.
Select a main module.
Select the View to apply.
Select applicable loading and other options.
(Optional) Select a sub-module if you want to get users' group memberships for example, and repeat Steps 2 and 3. You can go to down to the last submodule available.
There are several options available, from building your GridView right away to scheduling an export of the data.
Reset the selection of the module and View.
Save the current settings for the the module, submodules, Views and options. We suggest the name of the last submodule and View as the title. You'll see your saved settings on the right under ‘Saved GridView settings’ (10).
Schedule a report based on the current GridView configuration. Various options are available: recurrence. email, etc. You'll see the GridViews you’ve scheduled listed on the right under ‘Scheduled GridViews’ (10).
Create a GridView right away.
Email the exported GridView right away.
See your saved GridView settings. Click on one for more information and to see options to:
Run saved settings: Create a GridView based on what is selected.
Load saved settings: This selects the parameters of the saved Quick GridView on the left side. You can changes these.
Rename saved settings: Change the name and description as shown in the list.
Delete saved settings: Remove from list.
See your scheduled GridViews. Click on one for more information and to see options to:
Load saved settings: This selects the parameters of the saved Quick GridView on the left side. You can changes these.
Rename schedule: Change the name and description as shown in the list.
Edit schedule: Change the scheduled task settings like the date, time, frequency.
Edit configuration: Change settings for the Session used, Report options, Snapshot or Freeze Point options and Email Notifications.
Delete schedule: Remove from list and from the task scheduler.
Click on this announcement to see the list of Views that have been published.
Watch a short video on Quick Gridviews (see top of page)
