Save a custom view
Once you have arranged your columns, applied filters, sorting, or formatted your data, you can save this grid configuration as a new View, or update an existing View.
Need to share a view without collaboration enabled?
Export the views you want to import to the same module in another sapio365 installation. Views can exported as small XML files and can be easily emailed.
Limitations
The name of a custom view must not exceed 256 characters.
You cannot save a view from a Snapshot or a Freeze Point.
You cannot include temporary cell comments. You CAN include temporary column comments.
Save any conditional formatting applied to a visible column, including temporary column comments.
Save a new view
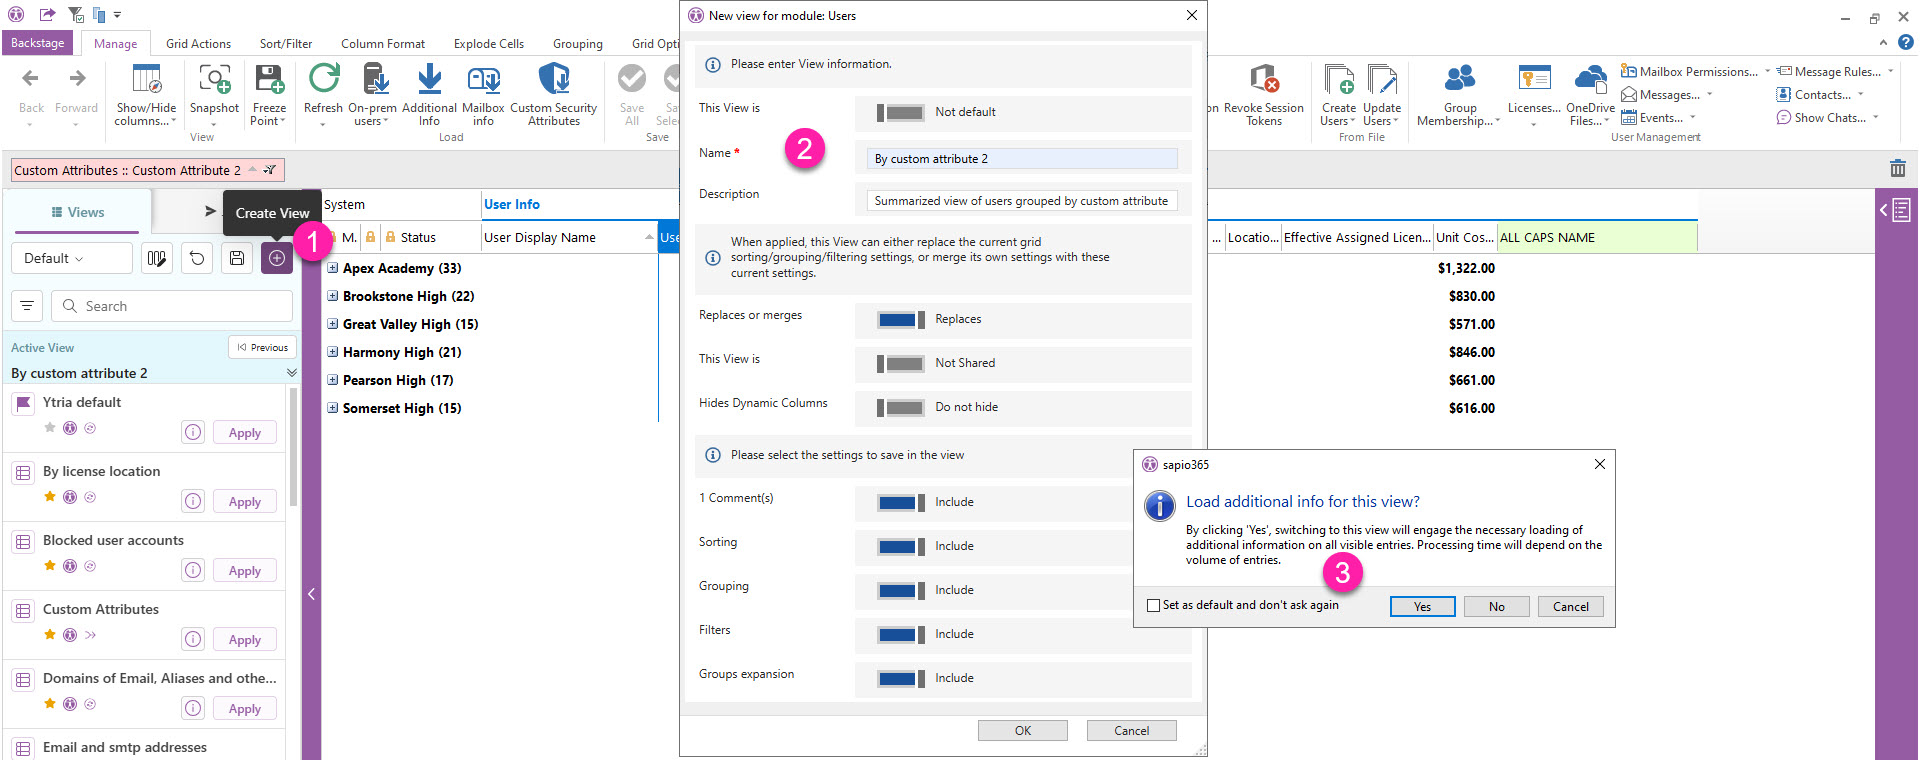
In the screenshot below, a new view is saved as “By custom attribute 2”.
Click on on the purple icon in the left panel to “Create View”.
Add a name and description.
See and confirm what’s configured in the view before saving it.
Optional: set view as default.
Other options include:
Set as ‘Replaces’ or ‘Merges’ with the previous configurations (visible columns, filters, etc). The ‘Replaces’ option is best suited for most needs.
Share this view with other sapio365 users. Available only if your sapio365 license is set for collaboration.
Show or hide dynamic columns from the previous view (for example, if Duplicates columns were shown in the previous view, you can choose to hide them in this new view).
Include temporary comments, sorting, grouping, filters, and groups expansion (collapsed or expanded groupings).
This message shows if there are visible property columns which require additional loading.
If you decide to load this info by default, you can always manage it in Preferences → Automatically load necessary additional information when switching views.
Your view is then listed in the Views panel on the left. Create as many views as you need.

Find a View
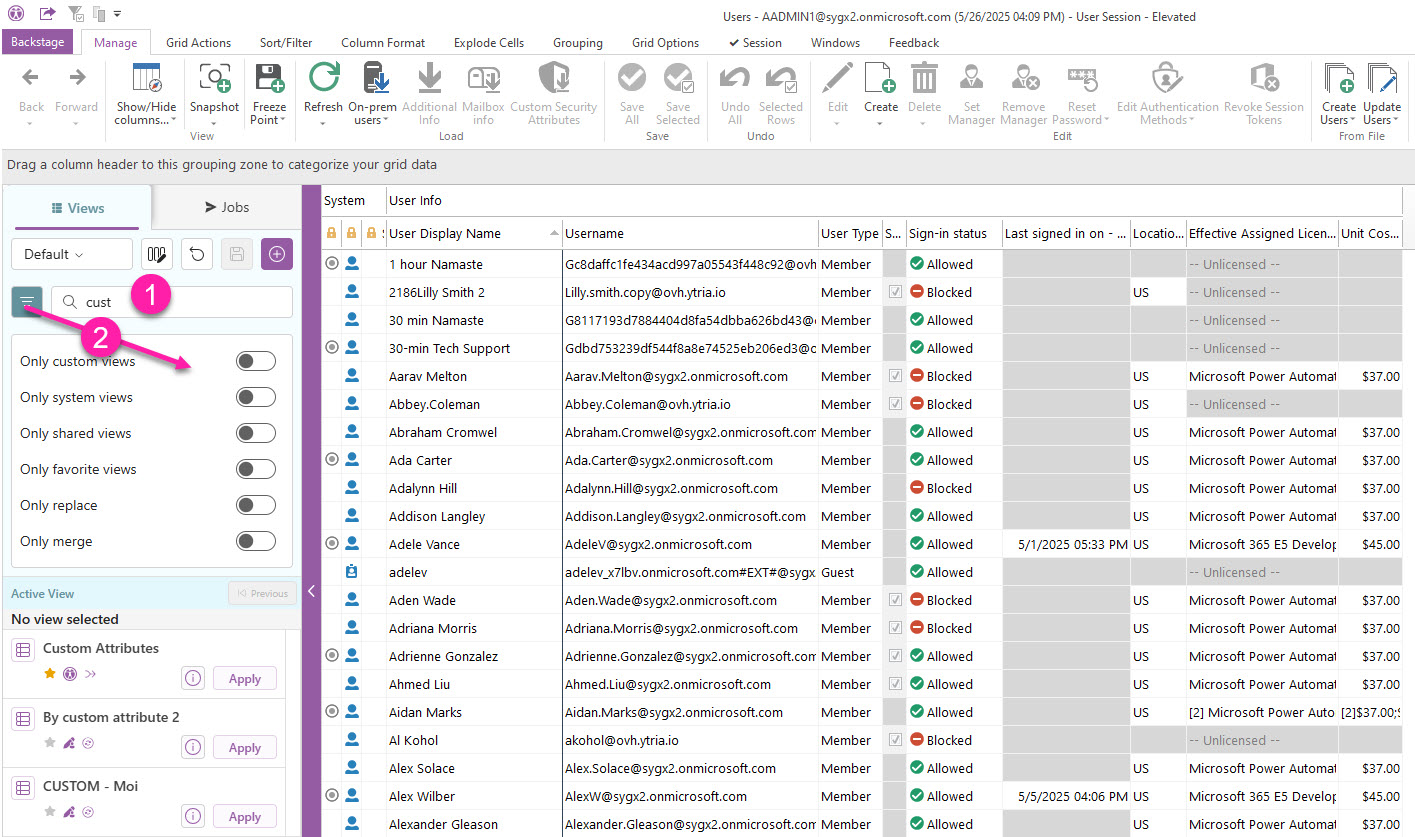
Use the search bar in the Views panel to find a View.
You can also apply a filter on the View type.

Edit the name and description of a view
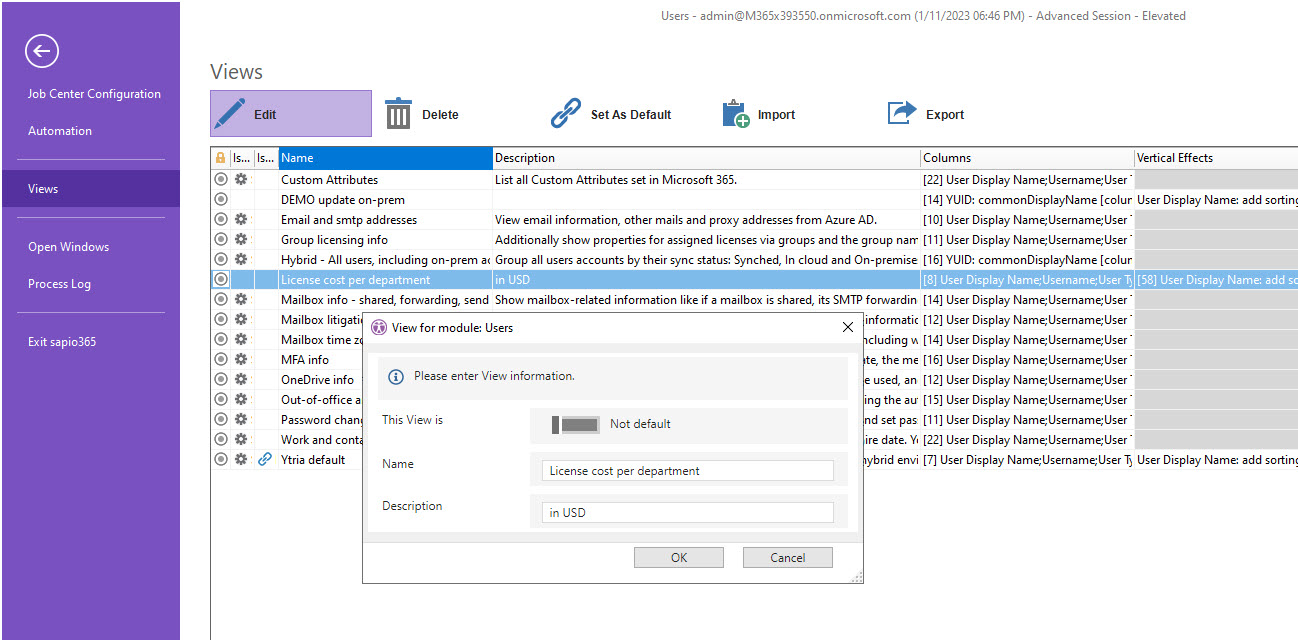
You can change the name and description of a custom view, as well as setting it as a default view.
Go to 'Views' in the back of the window, or click on 'Manage views' at the bottom of the dropdown menu.
Click on ‘Edit’ and make your changes.

Delete a view
System views (with lock icon) cannot be deleted.
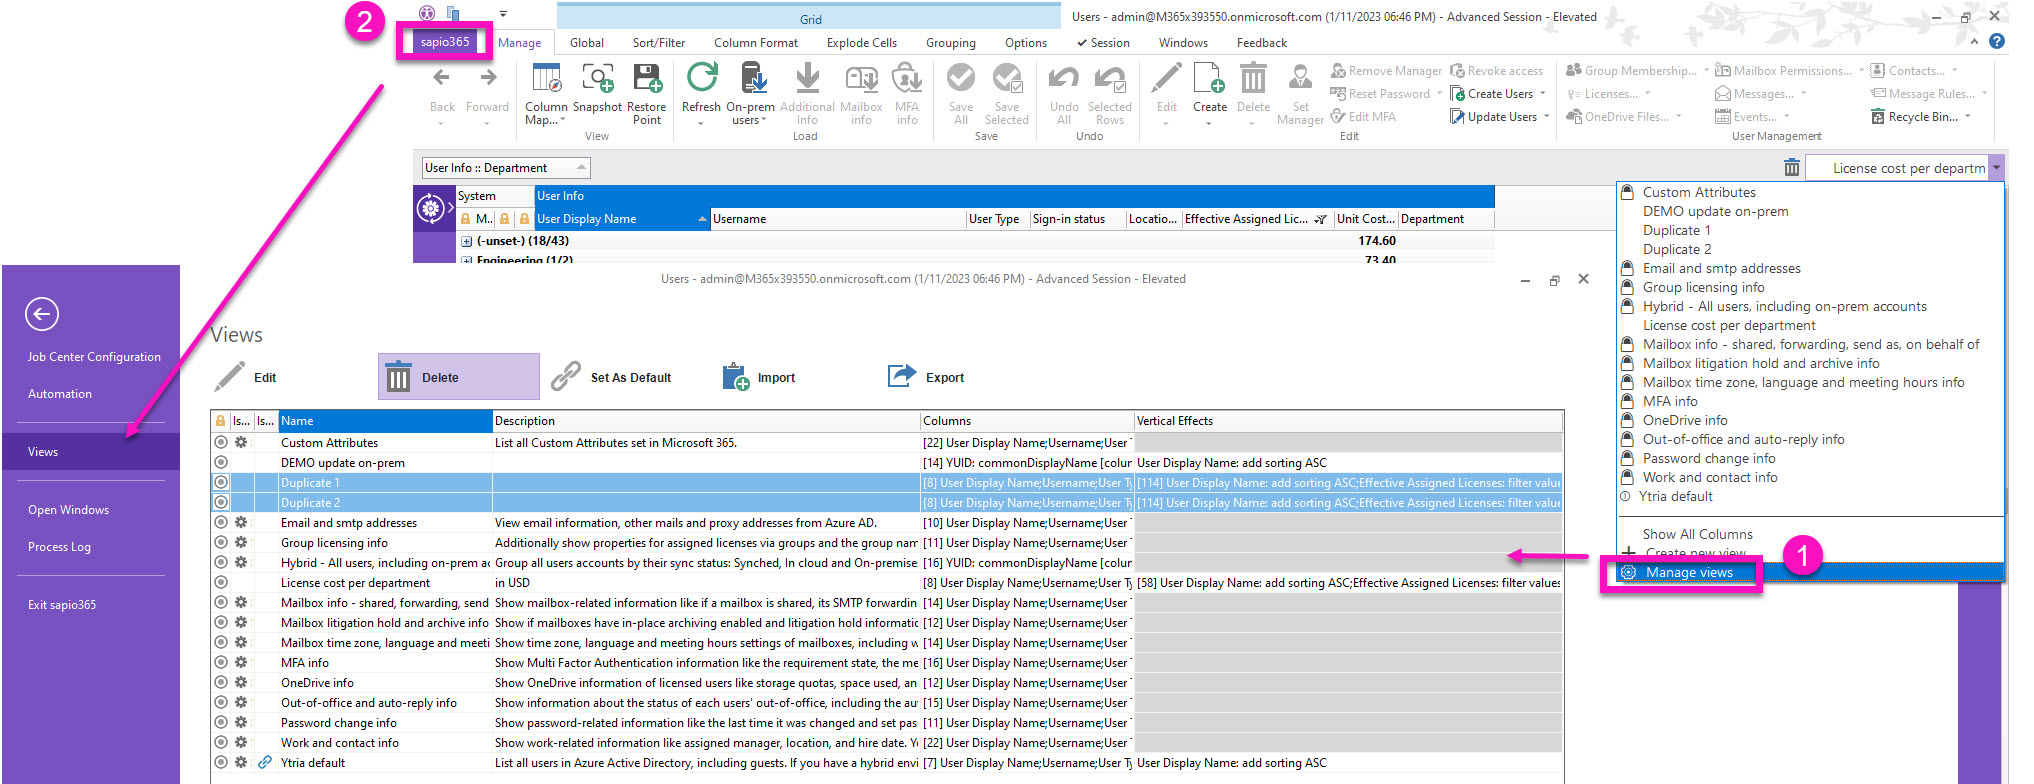
To delete views from the list, you have 2 ways to get there:
Click on Manage views at the bottom of the dropdown list
Access the section from the “back”.
Click on delete to remove selected views.
Delete views button does not ask for confirmation.

