
Your Microsoft 365 data is shown in a grid using a default view, a specific grid configuration (sorting, filters, groupings, etc).
Some modules have several preset views available.
-
These are system views created by the sapio365 team. They serve as a starting point. System views cannot be deleted.
-
You can create your own custom views from scratch or by modifying a system view.
Custom views can be shared with others if collaboration is enabled for a common sapio365 license.
You can find these views in the Views panel on the left of the grid.
Click on ‘Apply’ to switch between views.
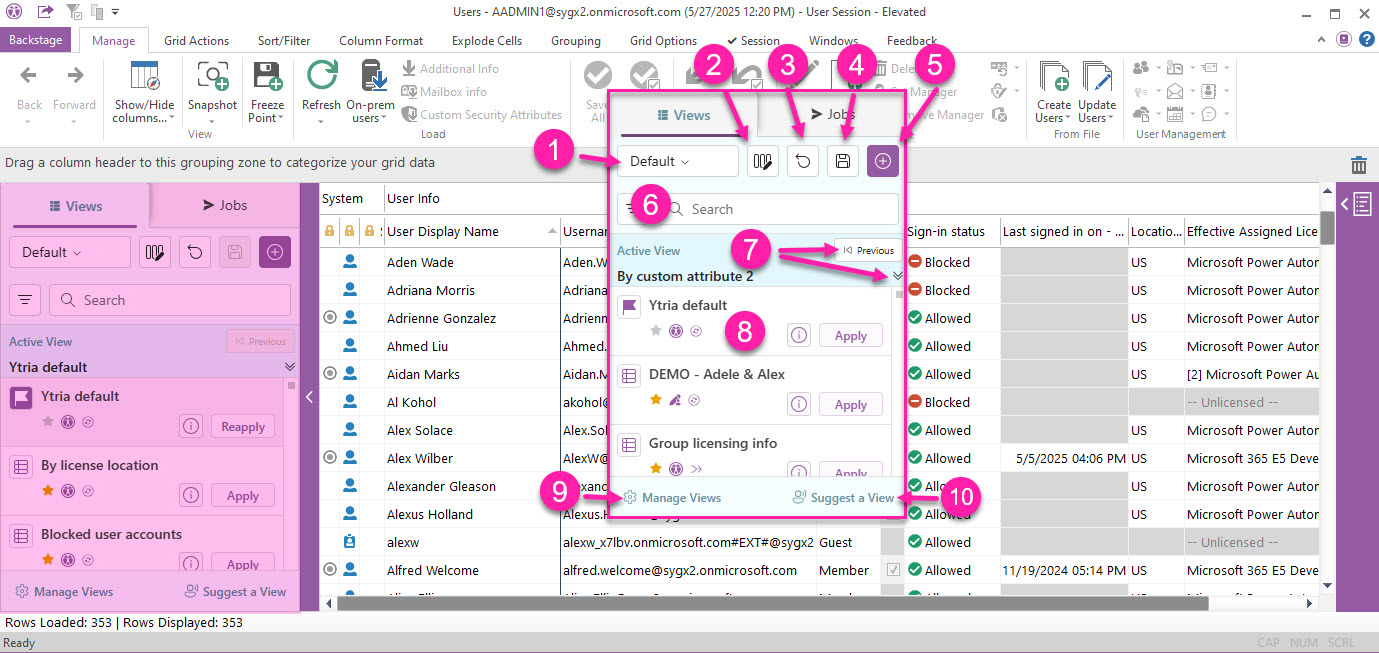
In this panel, you can:
-
Change the size of the data in the grid - pick between Narrrow, Default and Wide.
-
Add or hide more grid columns (same function as the ‘Show/Hide columns’ button at the top left of the ribbon).
-
Reset the grid.
-
Update a custom view (current).
-
Find a view by typing or use a filter.
-
See the current active view.
-
Go to the previously applied view with the ‘Previous’ button.
-
Click on the downwards chevron icon to go to the active view in the list (faster than scrolling down).
-
-
Manage views including renaming, removing or exporting views.
-
Suggest a system view to add so that others can benefit from it too.