
Starting with version 2.1.10, several modifications have been made to the different sessions managed by sapio365 and their related applications.
Standard Session
The Standard Session now uses the application “Ytria sapio365 - Regular Access (1.3)”.
This application only uses “delegated type” permissions that do NOT require an Admin Consent.
Due to this change, sapio365 users will have to provide consent again to the new application.
Following Microsoft’s decision to restrict certain “delegated type” permissions, the Standard Session’s functionalities are now extremly limited. Using a Standard Session, you can only see what you directly own.
More information about the Standard Session can be found here.
Advanced Session
The Advanced Session now uses the application “Ytria sapio365 - with Admin Consent (1.6)”.
This application has “delegated type” permissions that do require an Admin Consent:
Due to this change, sapio365 users (or the Global Administrator) will have to provide an Admin Consent to the new application.
More information about the Advanced Session.
Advanced Session - Elevated
To elevate an Advanced Session, sapio365 will let you create an “elevation application” with “application type” permissions. Before sapio365 version 2.1.10, “delegated type” permissions from the Advanced Session were used to perform the majority of actions in sapio365. The “elevation application” was mainly used to handle users' mail and OneDrives.
With the release of 2.1.10, sapio365 now uses the “elevation application” to perform the majority of the actions. The “delegated type” permissions will only be used for some specific actions related to group management.
This will ensure that elevating your Advanced Session will effectively extend your capabilities.
An existing “elevation application” may need new permissions to function properly. If this is the case, the Manage Privileges icon will show with a red dot like here:
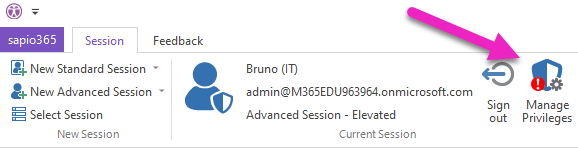
Click on the button “Manage Privileges” to see the current situation and fix it:
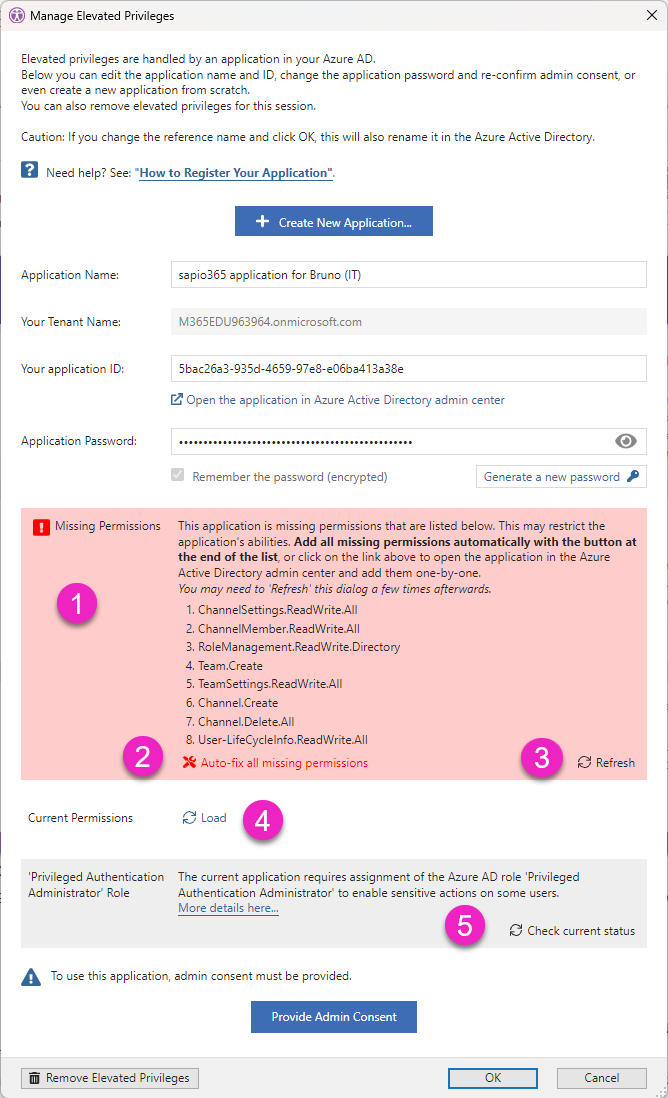
Manage the missing Application Permissions
The dialog will list any Missing Permissions in [1]. Using the button “Auto-fix all missing permissions” in [2] will let you automatically add the required permissions to the application.
Note: if you have the proper credentials, Admin Consent will be provided automatically. If you don’t have a proper role, like Global Administrator, the Admin Consent will have to be provided for the application to work.
Clicking on the button “Refresh” in [3] will check the situation again in case you fixed the permissions directly from the Azure AD portal.
To get a list of existing permissions set in the application, click on the “Refresh” button in [4].
The “Privileged Authentication Administrator” Role
Some sensible actions on users, like changing a password, require that the application has the “Privileged Authentication Administrator” Role. More details here…
Clicking on the button “Check current status” in [5] will show if the application has the role enabled.
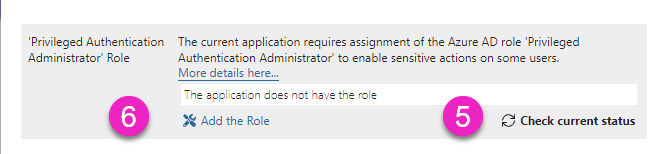
Clicking on the button “Add the role” in [6] will add the role to the application. There might be some delay before the new status gets effectively updated.