
Since version 20, EZ Suite uses a new registration and licensing system.
If you previously registered an earlier version (version 16 or older), you will still need to create a new account for this version.
Registration FAQs for version 16 and earlier products are available in this page.
Be sure to update your EZ Suite with the last version. The current documentation is using screenshots from version 20.0.7, which has been published on December 14, 2021.
Registration is a simple 2‑step process: you first create an account using a valid email address, then you enter your license code to unlock your product.
We offer two registration and licensing methods: online or offline.
-
Online: the software connects directly to our servers using your internet connection. This is the default method used in most cases.
-
Offline: the registration is completed either through a web browser or by email.
Registration - Getting started
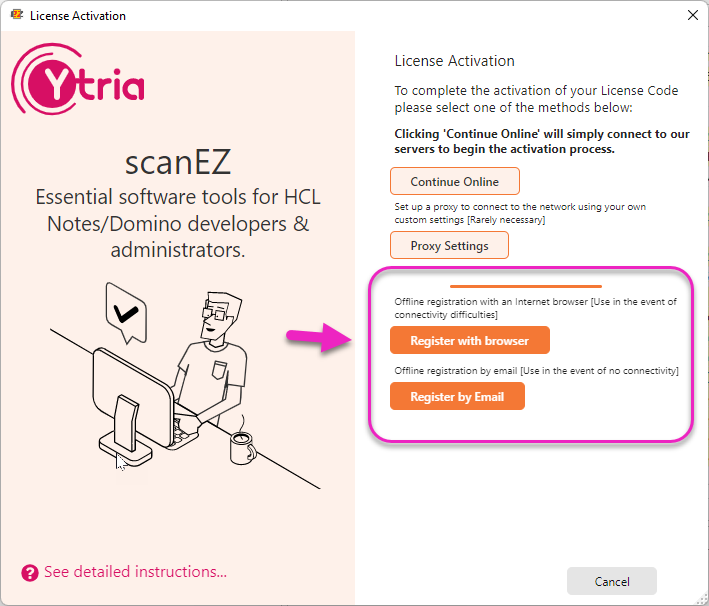
When you launch any EZ Suite product for the first time, you will see this dialog:
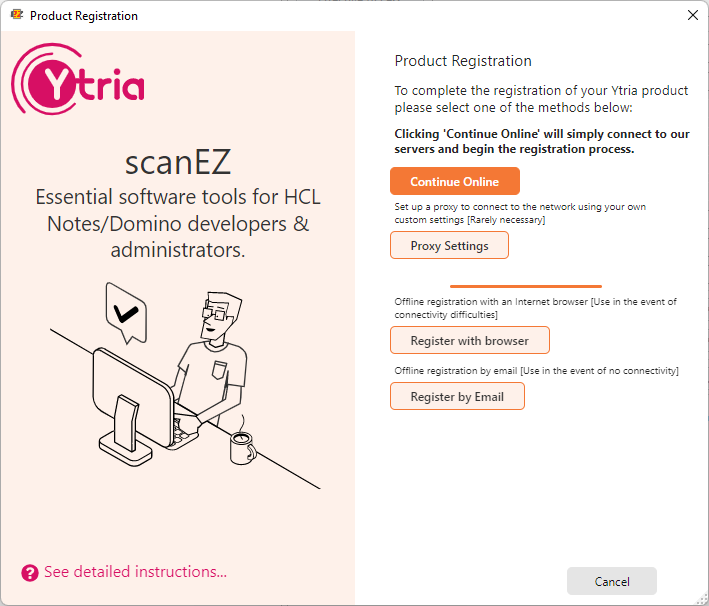
Clicking the Continue Online button will open the account registration dialog.
This is for most common cases, and assumes you have a regular working internet connection.
However if you have restricted or poor internet connectivity, the dialog on the left also offers options to deal with this.
You can review your proxy settings, connect with browser, or register by email.
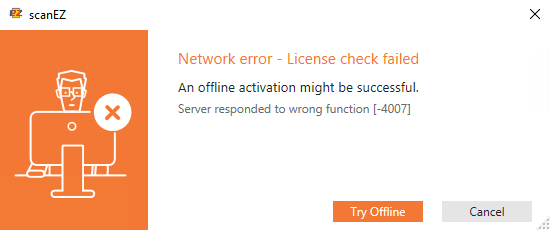
If the product encounters any network issue when using the Online registration, you will get the following dialog where you can ask to try the Offline approach:
A note about proxy settings
If testing your internet connection fails, you can try reviewing your proxy settings (if any) with the Proxy Settings button. With EZ Suite version 20 there are two servers that must be given access in your proxy settings: crm.ytria.com, my.nalpeiron.com (Nalpeiron is our licensing platform).
The 2 other servers tested in the following dialog, www.ytria.com and www2.ytria.com are for updates and in-product links to some help pages or else.
All communication with the two mandatory servers are done using communication protocol TCP, both on port 443 (Note: this is by default. It can be set to port 80 if really necessary). The server crm.ytria.com uses REST to communicate with EZ Suite application, while my.nalpeiron.com uses the SOAP protocol.
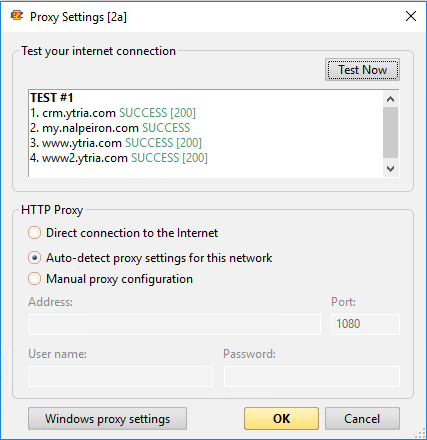
Unfortunately, it appears that Nalpeiron is totally unable to handle the "Auto-detect proxy settings" option, which may restrict the product to connect properly with their license management servers. So currently, the only way to handle this will be to set manually the proxy configuration, or use the Offline registration.
We are really sorry for all the inconvenience this generates, and we are actively working with Nalpeiron to see how they could address this annoying problem.
Whichever option you choose will proceed to the registration dialog [→ Registering your account].
Registering your account
Note: At this time, you also have the option to enter your license code to unlock the full functionality of the product. However, you will also have the option to do so from within the product Help menu [→ Entering your license code] at a later time.
Option 1 – If this is your first time registering, you can do so by filling in this dialog
Note: If you have already registered a version 16 or earlier, this dialog will be auto filled with your previous account info.
Please review this information and make any updates if needed.
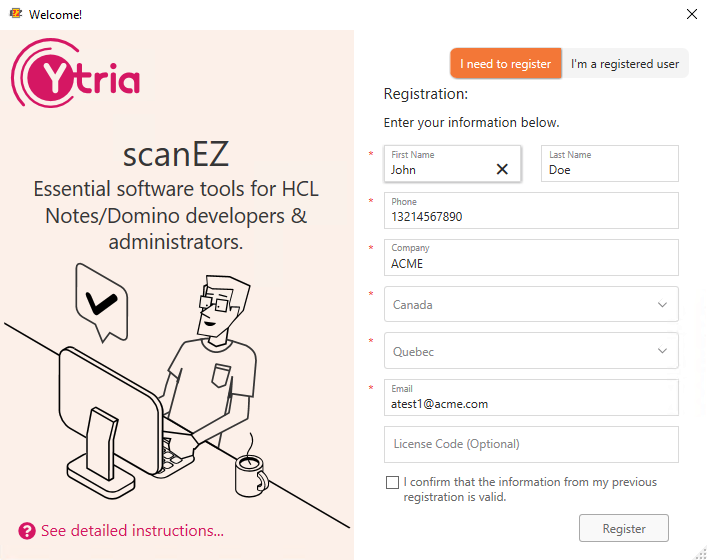
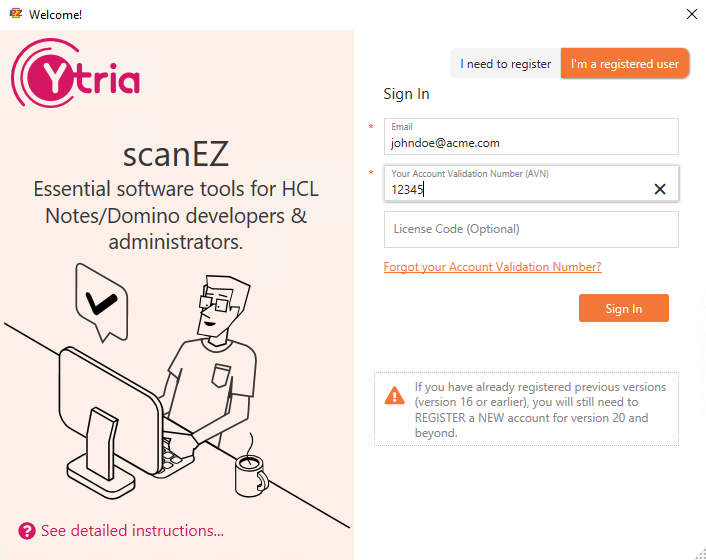
Option 2 – If you have already registered a version 20 account
If you already have a valid account as well as your AVN (account validation number), simply click the I’m a registered user tab at the top of the registration dialog.
Enter the email for your registered account and your AVN (account validation number). There is also an option to recover your AVN if you do not have it at hand.
If you are registering via the regular online method, then… Congratulations! This completes the standard account registration process.
When you first complete registration of your new account, you will receive and email confirmation with your new Account Validation Number (AVN). It is recommended that you keep a copy of this AVN for your records.
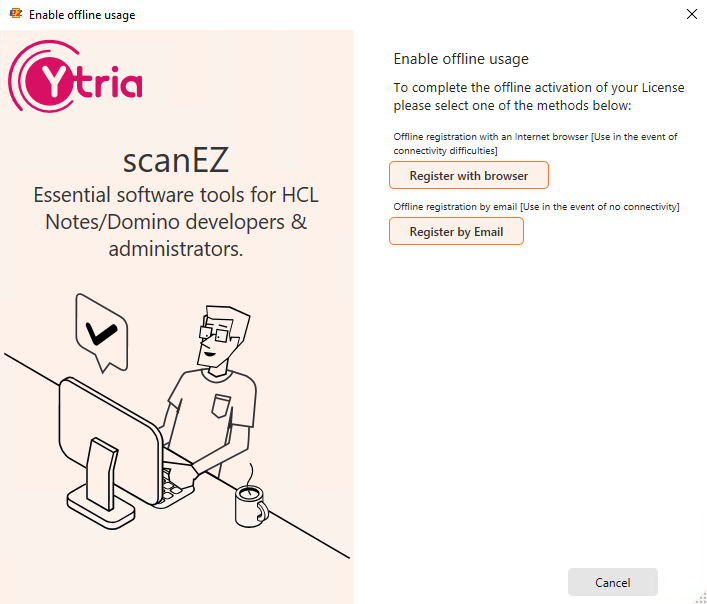
However if you have chosen one the offline options to complete product registration, please see below:
How to complete registration in cases of restricted or poor internet connection
If your internet access is limited or restricted in some way, you can use one of two options to complete registration:
The offline methods provide an alternative for machines that may have restricted internet access. However, these methods of validation will provide an offline license lease valid for 30 days.
Therefore, you will need to repeat this process every 30 days to re-validate. The advantage is that the product will not attempt to connect online and re-validate every time you launch it.
Option 1- Connect with browser
If you choose the Connect with browser option and, once you have completed the registration form (or signed in to your existing account), you will notice two items automatically open on your desktop:
– A windows explorer window with your challenge certificate
– A browser page to which you will drag & drop your challenge certificate
If your browser is on a machine that is separate from the one on which your product has been installed, then copy the challenge/ response certificate files as well as the URL, and complete this process from your alternate computer. For the final step, the response certificate will have to be copied back to the computer on which the product has been installed.
If needed, the URL to the Offline registration form is the following: https://www2.ytria.com/WebSite.nsf/Ec_OfflineReg?OpenForm&lan=en
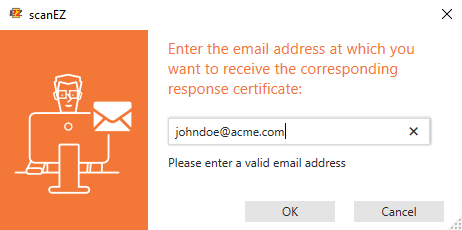
Please ensure that the email you provide in this page is a valid address so you can receive your response certificate.
Drag this challenge certificate [YtriaChallengeCertificate.ytr_reg] into the browser dialog. Click Submit.
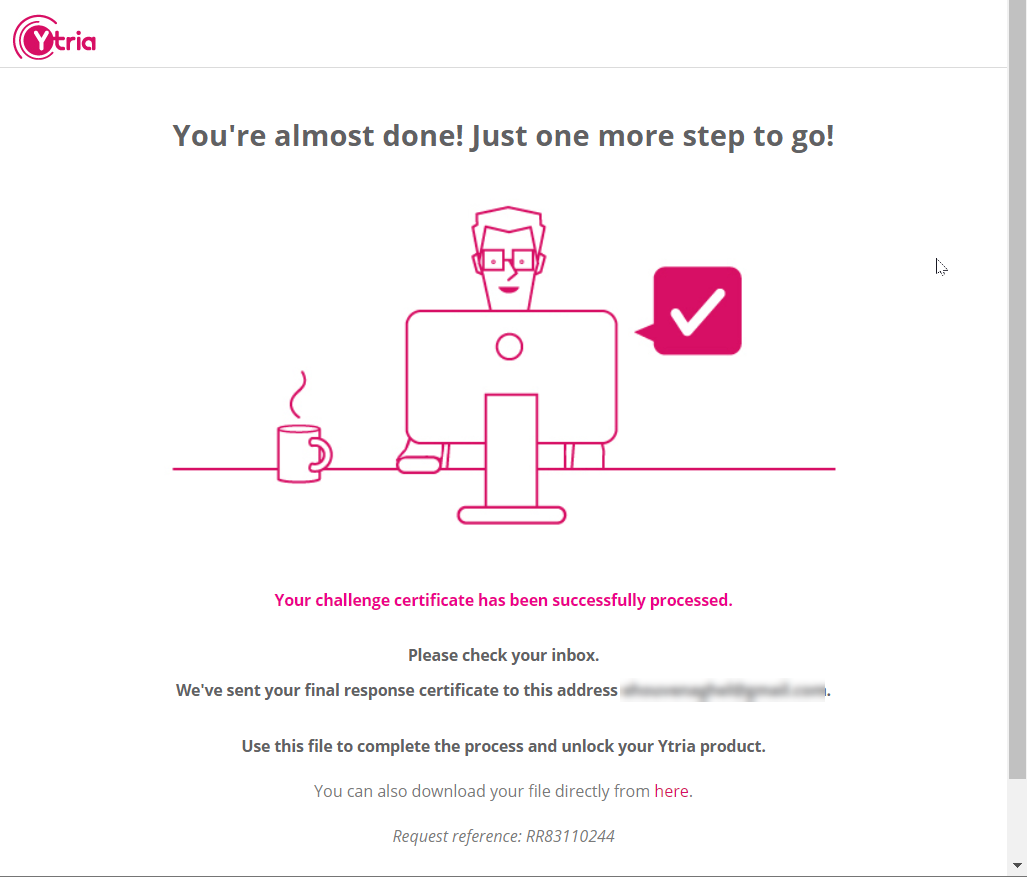
A confirmation page will ask you to check your inbox for email containing the corresponding response certificate.
At the bottom of the page, you will find a link that will let you directly download the final response certificate file. The reference of the request is also provided as a reminder.
Entering your response certificate is the last step in the process.
→ Proceed to response certificate
Option 2- Register by email
If you choose Register by email option, you just have to enter your email address.
A dialog will confirm that your request has been sent to Ytria.
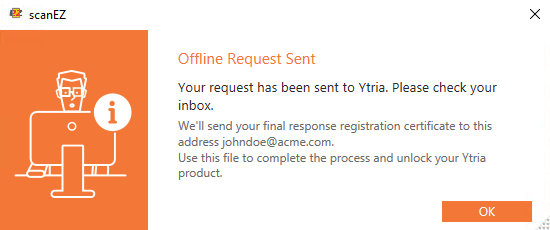
Check your inbox and locate the email containing your response certificate.
Entering your response certificate is the last step in the process.
→ Proceed to response certificate
Entering your Response Certificate – The Final Step
Entering your response certificate is the final step to complete your product registration.
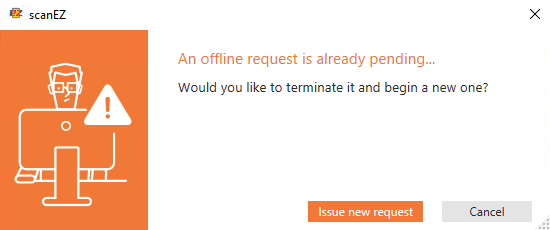
There can only be one “active” certificate request at a time. [→Troubleshooting]
Starting with version 20.1.1, a unique request reference is generated. The final response certificate file will be named using this reference. And this reference will be shown in the dialog where you have to drag and drop the file.
There are three ways to do this:
-
By default, the drag & drop dialog will have been opened for you automatically as the next step in your offline registration process.
-
Or, if you closed the product and re-launched it, and an offline registration request has already been sent, the opening dialog will offer you an additional fourth option to enter your response certificate:
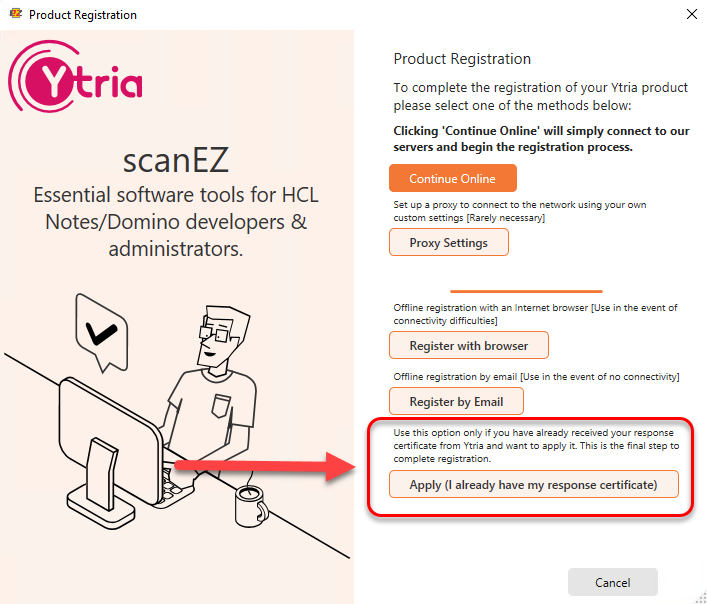
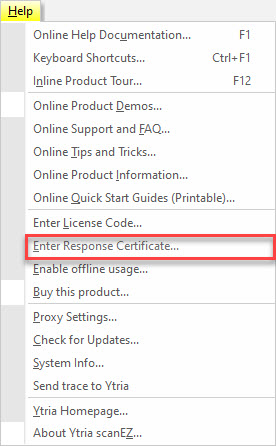
3. Alternately you can access the same dialog from the product Help menu here:
To complete the final step, simply drag & drop your response certificate into this dialog:

The name of the file that is shown in this dialog is unique and really important. If it does not match the file name you are trying to drag & drop in the dialog, this means you are trying to use a response certificate from a previous offline process.
You cannot mix offline requests, since a response certificate must match its challenge certificate.
This can be done directly from your mail client, as shown here:
In the end, a message box will tell you the license has been successfully activate, with a recap the situation:
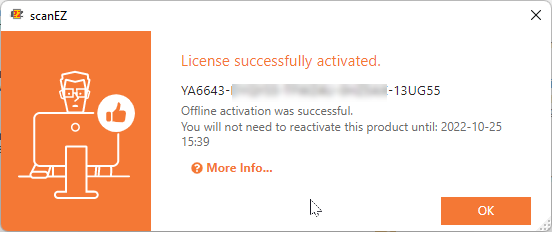
Congratulations, your product is now registered!
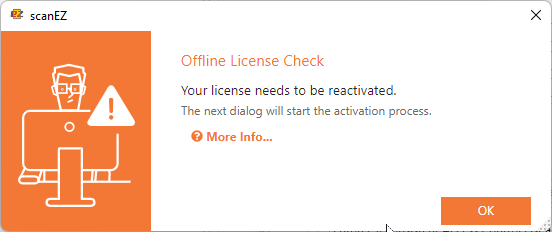
Renewing your offline license lease
When the offline license lease expires, you will get the following dialog telling you that you need to reactivate your offline license:
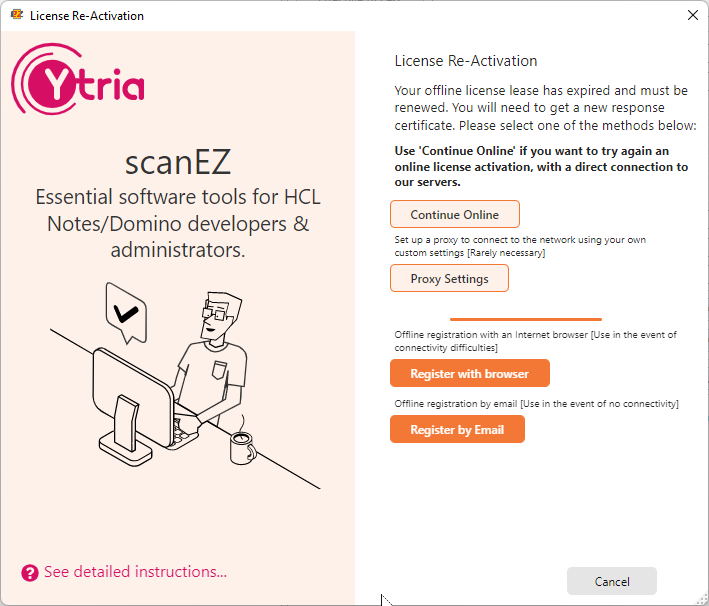
Clicking OK will bring you to the following dialog where you go through the offline process again, or even try to use the online process, if for example your proxy situation changed since last time:
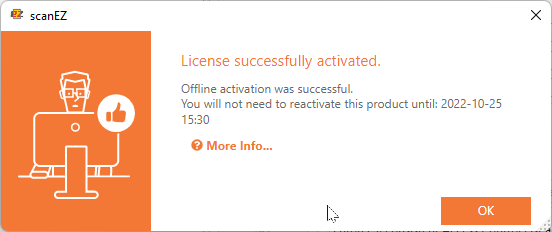
Once the offline process finished, you will get the conformation dialog:
Entering your license code
If you have already registered your account, and simply want to unlock the full functionality of your product, you may do so within the product from the Help menu:
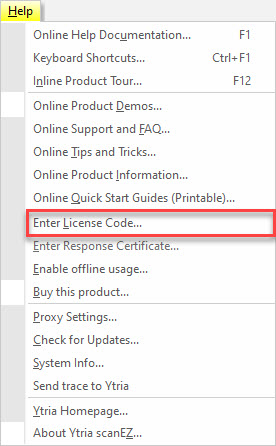
Once you click Apply, you will get the following dialog:
Clicking Continue Online will process your request online. Congratulations! This completes the standard license activation process.
However if you have restricted or poor internet connectivity, you can try one of the offline options to complete license activation:
→ Go to connect with browser
→ Go to register by email
Troubleshooting
Cancelling a registration process and starting over
If you initiate the registration process, during which a response certificate is being emailed to your inbox, and you decide to interrupt this process and start over, you will have the option to do so.
However each response certificate is specific to the process request that initiated it. Therefore starting over will cancel any previous request.
Therefore, when starting over, use care not to mix up any previous (outdated) response certificates with your current request.
Switching to offline validation
When any product is launched, it will run a quick validation check to the registration server.
However, for users who need to re-launch products very frequently, it can be preferable to use the offline option. The advantage is that the product will not need to re-validate for 30 days.
If you have already registered online and would like to switch to the offline option, you can do so from the Help menu in any product: ‘Enable Offline Usage’
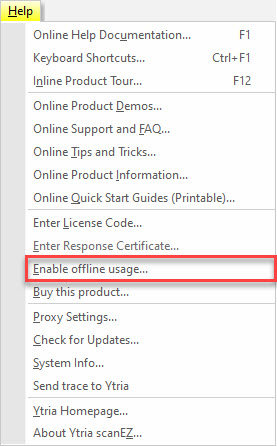
You will then get the following dialog:
The Key Depository
Important Note
Important: Even if you have used the Key Depository in earlier versions (v16 or before) you still need to redo the 3-step process as shown in the Key Depository database. This article provides a quick explanation of how this works.
The Key Depository Database lets an administrator store license keys for Ytria software products on a server.
It provides an alternative means of registering your software and is primarily useful to organizations who need to distribute and manage a large number of licenses.
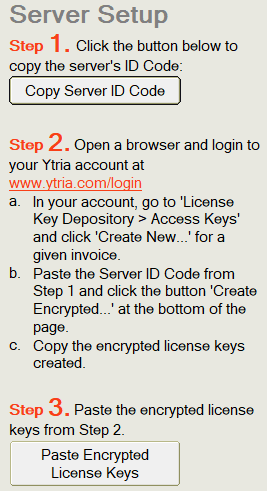
The Key Depository – how it works
The Key Depository uses the server ID code that you provide to create a kind of ‘encapsulated certificate’ of the license codes available within the invoice you select. This certificate is then used to implement these license codes inside of the Key Depository database, so they can be deployed securely to your users.
In short, it‘s a kind of snapshot of the license codes taken at that time.
For this reason, even if you have used the Key Depository in earlier versions (v16 or before) you still need to redo the 3-step process as shown in the Key Depository database (pictured):
Note that the Key Depository database is only a ‘distributor’ of license codes. It uses the exact same license codes as the ones you may have used previously. It does not generate new license codes.
In other words, rather than entering the license manually, you have it provided automatically by the Key Depository database instead.
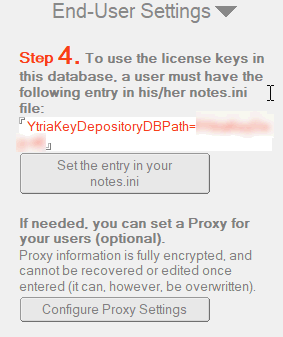
A word about servers
All the information in the Key Depository database is encrypted by and for the server it resides on.
This means that the Key Depository databases cannot be moved between servers.
So when installing on any new server, the best option is to create a new Key Depository database on this new server and then re-do the process from this server.
Note that the notes.ini entry will need to be changed so it points to the correct new database.
For additional information about the Key Depository see this page: Getting started registration key depository database
License codes
There are some important differences in the new registration system.
Note: AS OF VERSION 20, ONLY ONE LICENSE CAN BE ACTIVATED ON ONE COMPUTER AT A GIVEN TIME.
This is different from previous versions (v16 and earlier) which employed a one-key-per-product method.
Using a license code for your suite (EZ Admin, EZ Dev, EZ Suite Complete)
If you are using a license code for your suite this should be fine. You simply enter your license and it is recognized for the entire suite.
Using license codes for products individually – merged licenses
However please pay attention if you are installing more than one product and entering an individual license key for each. In this case we would need to know if you will be the only person using that license.
Then we will ‘merge’ those into a single license, which will include/ recognize all the products that are being installed together.
One way to avoid confusion is to inform us by email which license you are authorized to use. Then we can confirm you have the correct license for the combination of products you are installing.