
Installation and Configuration Steps
Please follow the instructions outlined below to download and install the sapio365 product. The solution can be configured to run in ‘collaboration mode’ so that multiple administrators can share reports, data views, and work on activities together. All actions are completely logged and available for audit purposes, including the name of the administrator and the date / time they were performed.
Software Installation
The sapio365 solution is a desktop application that you can install on your local computer during testing and evaluation. Here’s a link to the download page for the latest version of our solution install. https://www.ytria.com/sapio365/download/
Please use this link to a watch video showing a regular installation process. https://vdo.ytria.com/sapio365/onboard/Installation.mp4
Finally, you should connect sapio365 to your own tenant and register the application. Please follow these steps included in this Help document and choose the ‘Advanced Session’ option. Connect sapio365 to your tenant
Enable Access to Different Tenants
To setup access to multiple tenants from within sapio365 you will need to create a connection with the appropriate credentials for each M365 environment. Follow the instructions outlined in this help page to setup these connections. This is required before you enable RBAC for different administrators to access those customer tenants.
Start by going to the sapio365 main access tab and go to the ‘RBAC – Configuration’ menu to set up the credentials to use for the roles you will create. In the ‘Credentials’ tag, click on the ‘Create’ button and follow the instructions to fill out the link to the customer tenant.

Once these credentials are configured you can edit them as needed in the future.

Assigning Role Based Access Control (RBAC)
The RBAC system in sapio365 is based on permissions mapped to every action in sapio365. You can create custom roles by selecting only the permissions you need to delegate. The actions that you’ve chosen for the role can then be only enabled for a specific scope, or set of users, groups, and sites.
The roles you create, the scopes and role assignments, also known as the sapio365 RBAC configuration, are stored in a local encrypted database on your machine, or the centralized VM where you setup sapio365 initially.
Please use this link to a watch video showing the setup and configuration process for RBAC.
https://vdo.ytria.com/sapio365/onboard/RBAC.mp4
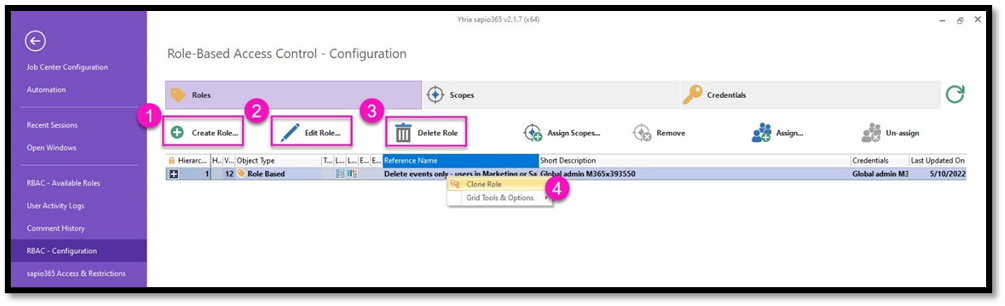
Go to the ‘RBAC – Configuration’ menu in the main access tab to set up the Roles you want to create. Please note that once you create a Role, you can easily copy it to different tenants by using the ‘Clone Role’ option as shown in the screenshot below.
Please use this Help document for more detailed information. Delegate Admin Rights within sapio365 using RBAC