Cell Comments can be used as sticky notes, but you can also use them as calculated columns using JavaScripts and reference columns.
How to add Cell comments
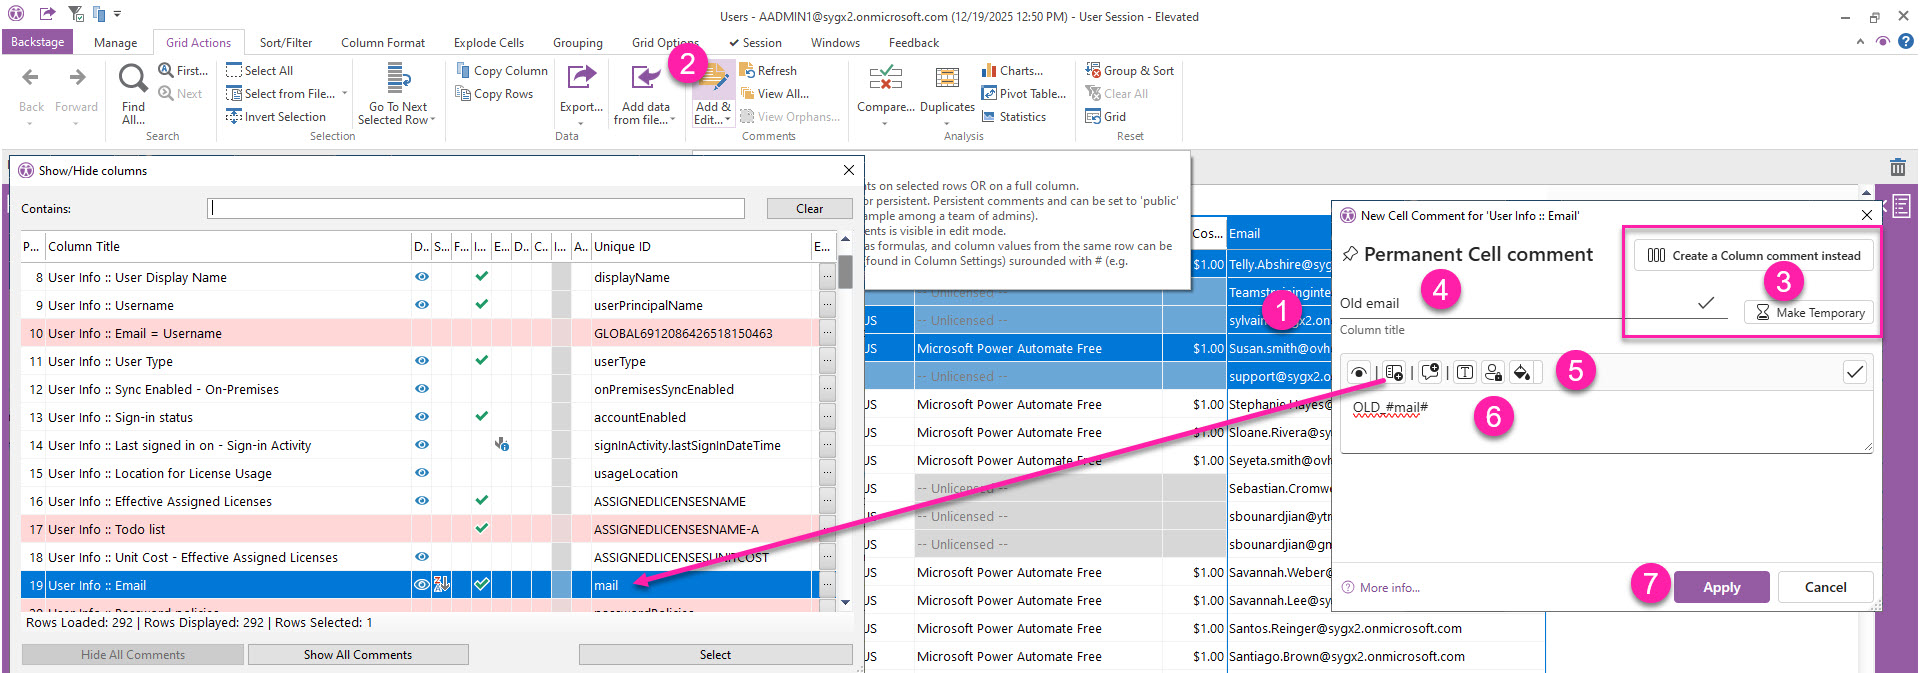
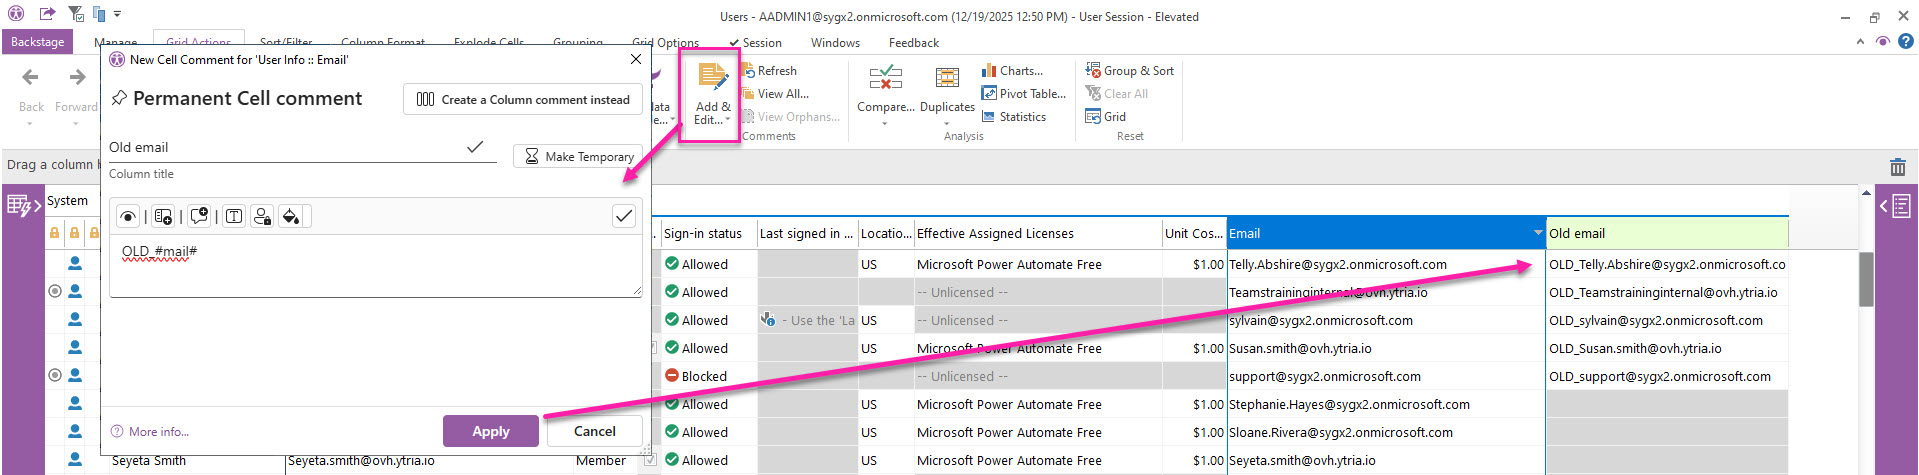
In the example and image below, a prefix "OLD_" is being added to the email.
-
Click on a column (Email) and select the entries for which you wish to add the note or comment. The comments column will be added on its right side. You can always move it after.
-
Go to the Grid Actions tab → Add & Edit Comments.
-
(Optional) You have the option to switch to a temporary and a column comment by clicking


-
Enter the title for the new column.
-
(Optional) See the table below for the various available options to use reference columns, use a formula, share comments and apply a colour.
|
Button |
Shortcut |
Descripton |
|---|---|---|
|
|
Ctrl + W |
See the calculated value of the applied formula on the first row of the selection. |
|
|
Ctrl + Insert |
Select a reference column from the Show/Hide Columns grid. |
|
|
Ctrl + R |
Select a value or formula that was previously used. |
|
|
Ctrl + F |
Switch from text to formula |
|
|
Ctrl + S |
Switch from public (shared) to private comment |
|
|
|
Select a cell background colour. |
-
Enter a note or a formula. In this example:
-
Type OLD_ and switch to using a formula by clicking on


-
Add a lookup reference by its column ID between # (in this example, #mail#), or select it from the Show/Hide Columns grid that opens when you click on

-
-
Click Apply.