Define custom roles
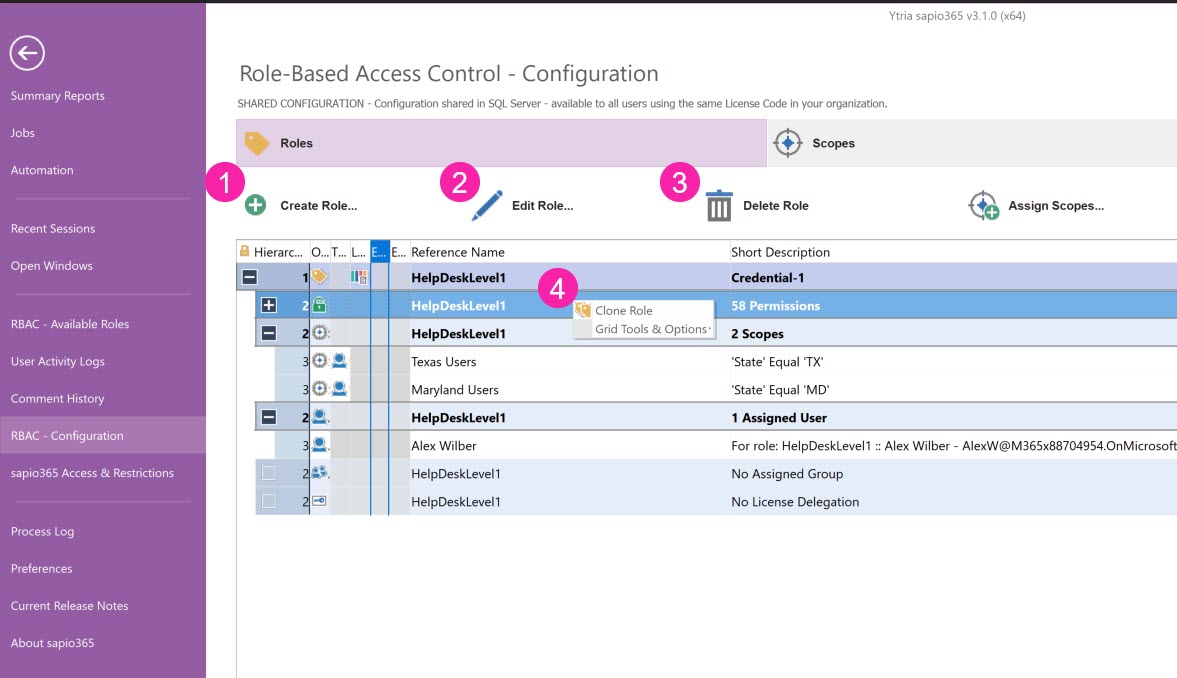
From the Dashboard, at the top right, choose RBAC > Configuration, then the Roles tab, where you can:
Clone roles (right-click menu)

Create a new role

Step 1 – Click on ‘Create Roles…’.
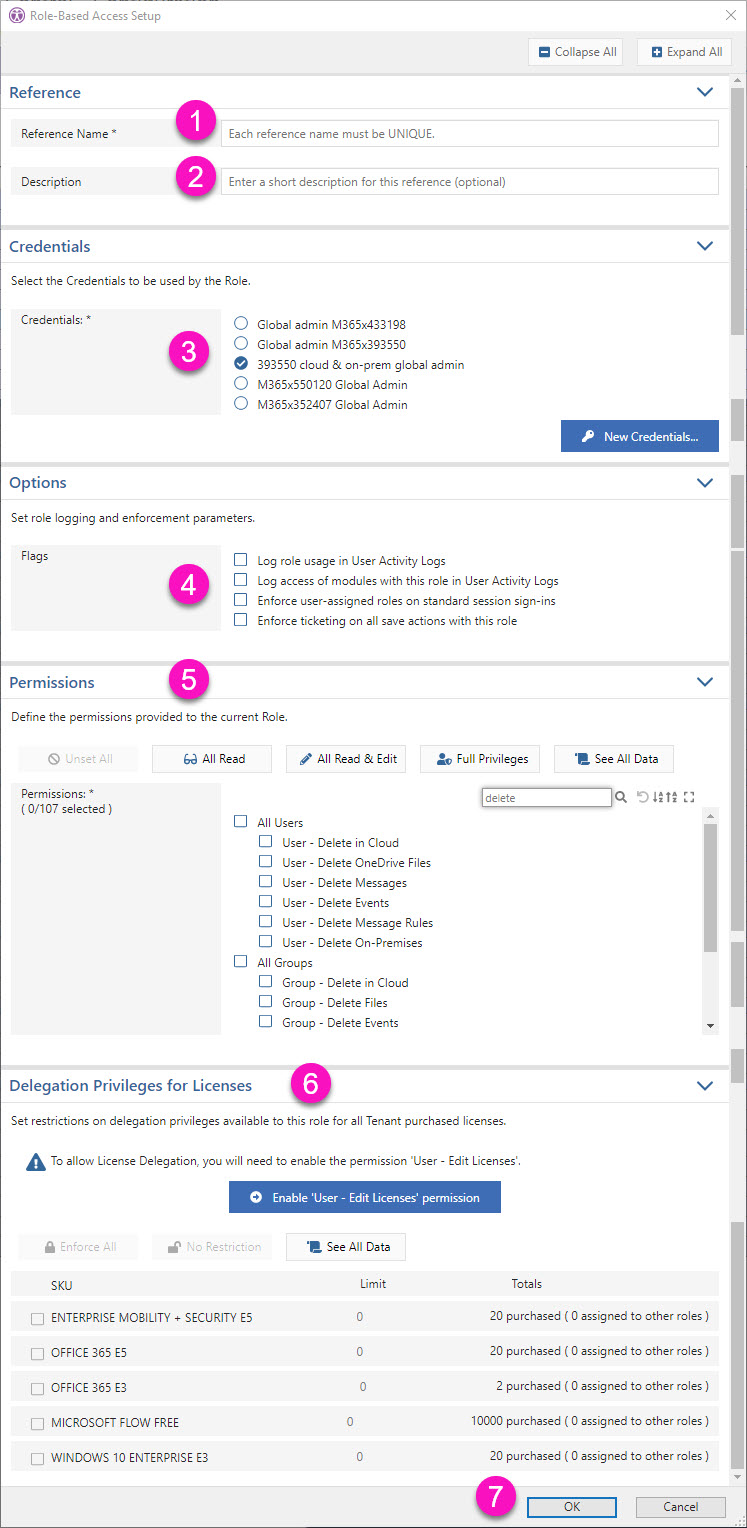
Step 2 – Enter a unique, meaningful name for the role and a description, which will be shown to assigned users.
Step 3 – Choose the credentials you wish to use with this role. You can create a new one by clicking on the button ‘New Credentials…’ (see how to set up credentials).
Step 4 – By default, only changes sapio365 users make are logged in the User Activity Logs.
Check the first two options if you wish to keep track of when users use sapio365 roles, and what modules they access.
The third option makes it mandatory for any assigned user to take on a role when signing in to a sapio365 Standard session.
The fourth option makes adding a ticket mandatory for all save actions with this role.
Step 5 – Select sapio365 RBAC permissions to customize the role you are creating.
Tip:
Click on :expand: to expand the full list of permissions.
Click on :search: to search for matching permissions.
Step 6 (Optional) – Use this section if you wish to limit the number of licenses to manage. Make sure to include the license management permission by clicking on ‘Enable ‘User – Edit Licenses’ permission.
The Delegation Privileges for Licenses section is not available for multi-credential roles. You must select only 1 set of credentials.
Step 7 – Click OK to save this role, which you will then see in the list of available roles.
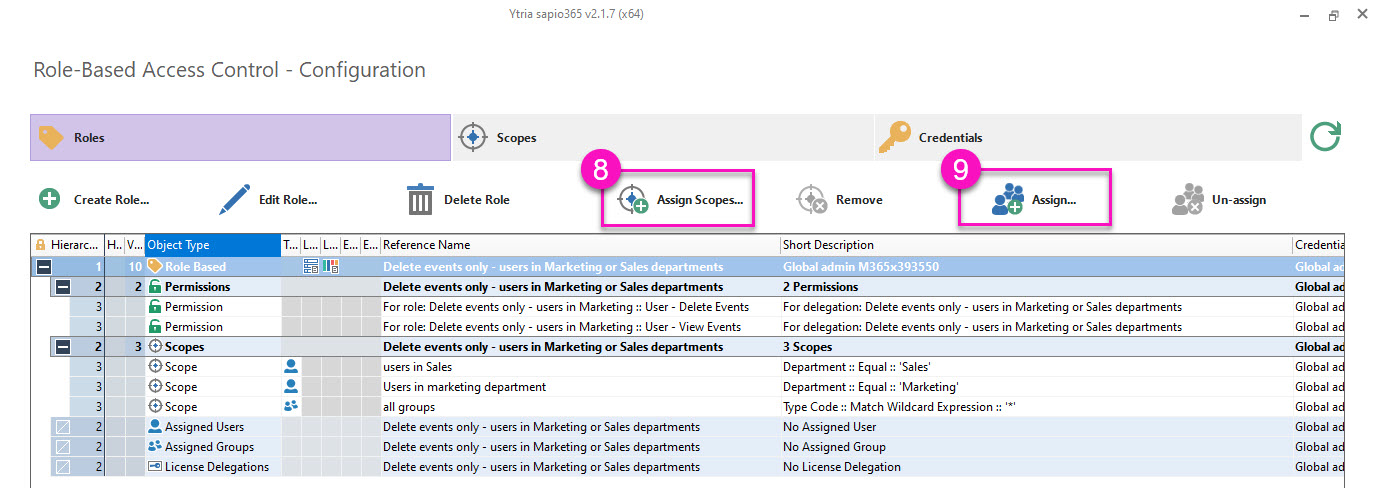
Assign scope of action and assign users to selected roles in the grid.
Step 8 – Assign the right scopes (learn how to add scopes).
Step 9 – Assign users or groups (learn how to assign users).

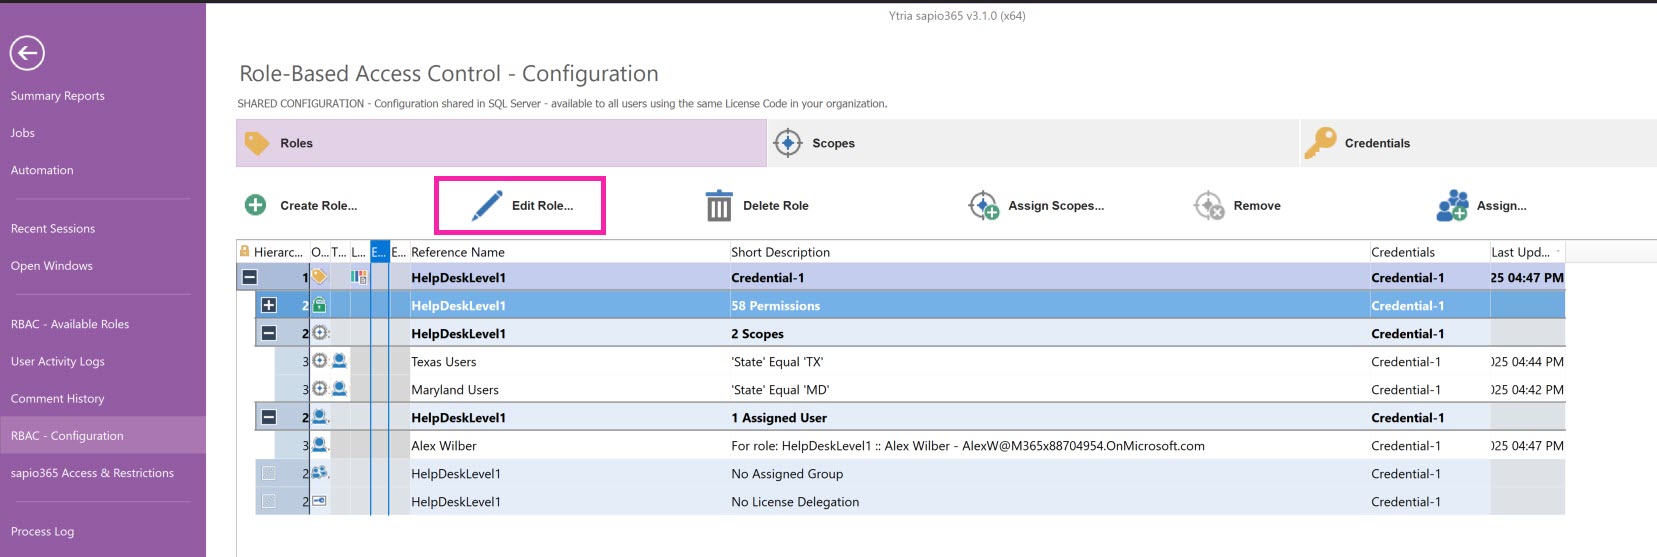
Edit a role
Select a role to edit it using the same dialog as for role creation.

Delete roles
Make a selection of roles that you wish to remove. You will be asked to confirm the deletion.
The scopes associated with the roles will remain in the list of available scopes for the next custom role you build.

