Store cache on your MS SQL server
If you have several sapio365 users, you can significantly improve performance for all by allowing them to share a single cache
sapio365 creates a local cache for the lists of users, groups and sites for each installation.
An option to centralize the cache in order to share it is to store it in a Microsoft SQL database within your network.
Benefits of shared cache:
The shared cache can be updated in one location. This update can be scheduled.
All your sapio365 users can opt in to the shared cache to always have access to fresh data.
Here’s what you need to do to enable this.
Ask your database administrator to create a single database that can be accessed for a specific user. This user must to be able to create tables in the database.
Some important info for the Microsoft SQL database setup:
You must create the database. Note that sapio365 does not create the database. This usually requires some access level to the SQL server outside of our control. Setting this up is your responsibility so that you can set the proper security access on the database.
The user set in the database must have the ability to create and delete tables, in addition to a full access to the records. Usually, our customers create a dedicated user in the database for sapio365.
Set up the connection to this server via sapio365 for a specific session, or for a delegated RBAC role when setting up credentials.
Set SQL Server Protocol (OLEDB or ODBC) in Preferences ->Global.
Note that this requires that everyone access the SQL Server on the same port 1433 (or any other port you choose to use).
The cache is stored by tenant. So the first user on a given tenant who connects to the SQL cache for the first time or after a database purge will re-build the cache (this may take some time). Users who connect afterwards will be able to only do a refresh of the data.
Set a shared cache on a specific session
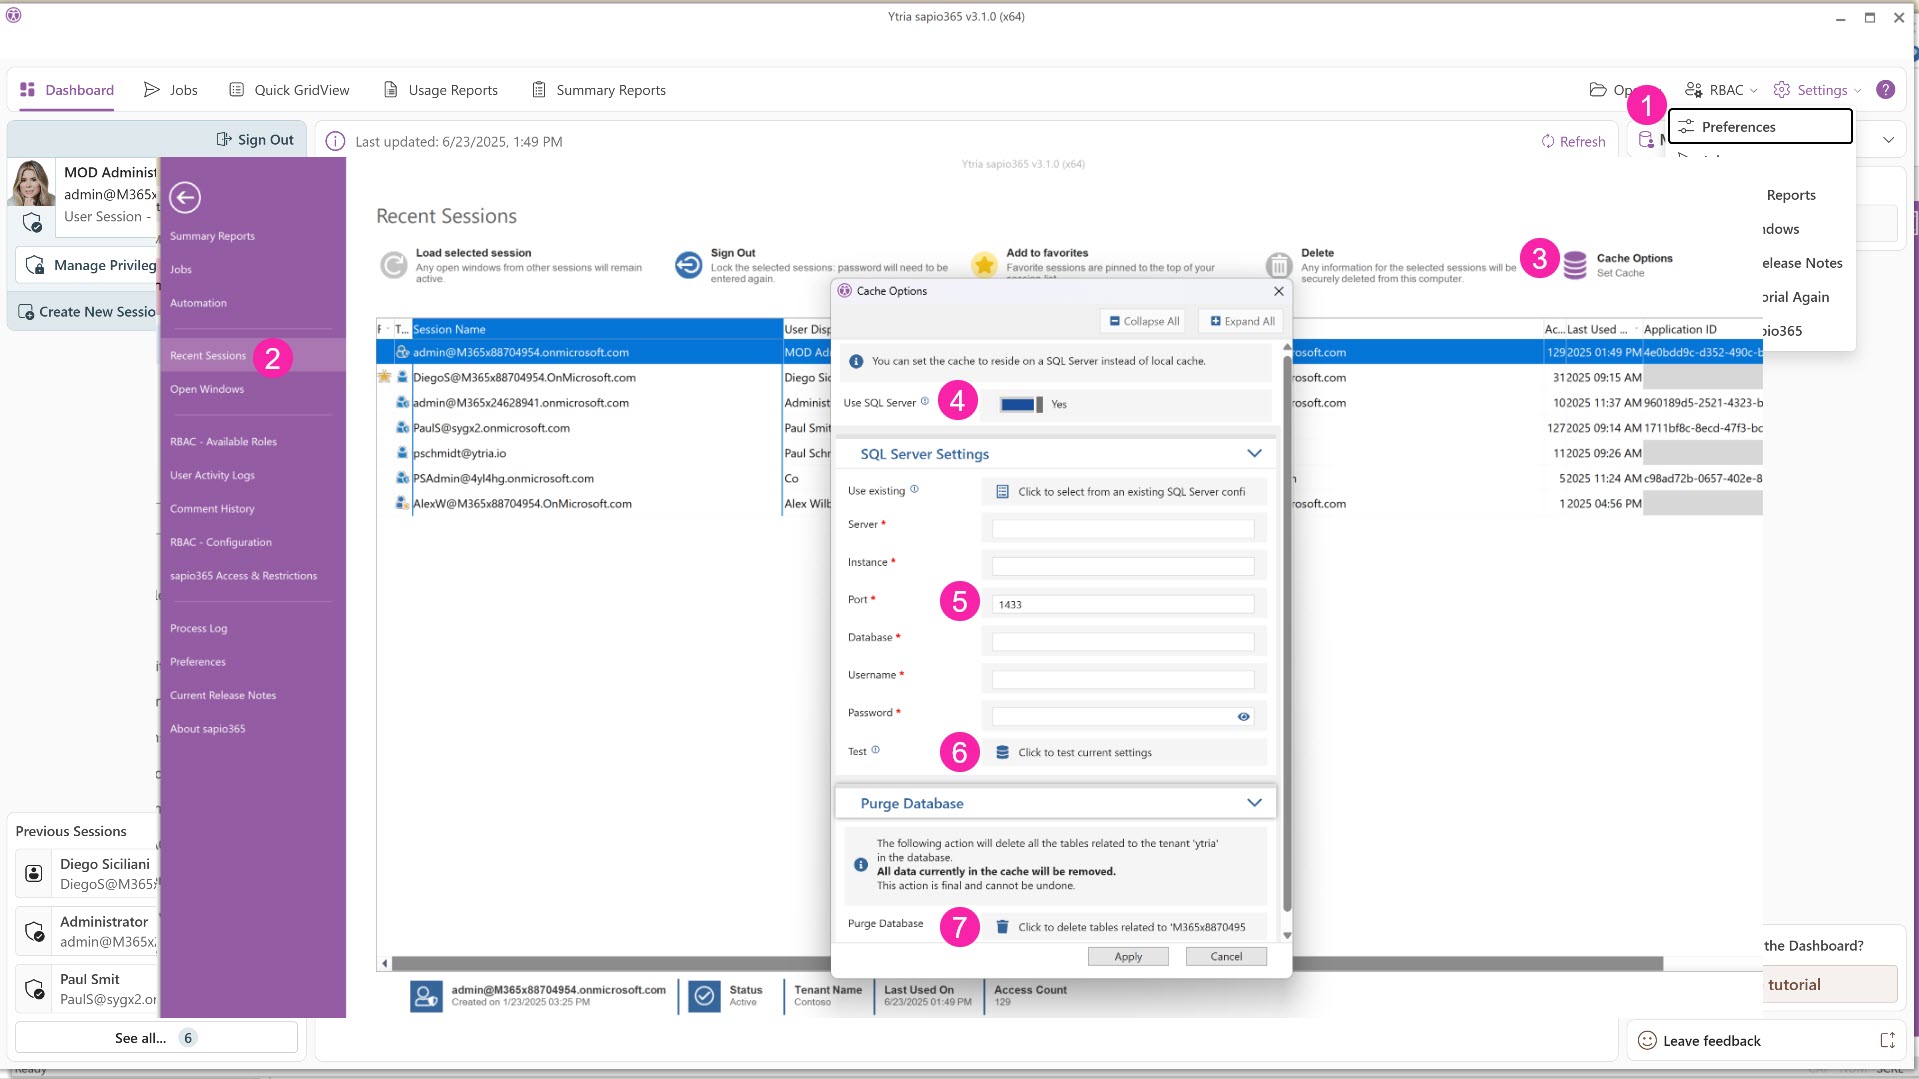
The steps are shown in the image that follows.
In the Dashboard, go to the sapio365 ‘backstage’ using any of the dropdown menu items of Settings at the top right.
Go to Recent Sessions and select a session (blue) for which you wish to set a shared cache on.
Click on the top-right button “Cache Options”.
Toggle to ‘Use SQL Server’ in the dialog to ‘Yes’'.
Fill in the settings.
Use existing settings
If you have set sapio365 collaboration using a Microsoft SQL server, and if you want to use the same server for shared cache, click on the icon next to ‘Click to select from an existing SQL Server config’.
You can test the connection by clicking on the Test icon.
If there is an error, check your credentials and the information you entered.
If the error persists, you can check the connection directly instead of through sapio365. There may be an issue with how your database is setup.

Purge Database Option
You can delete an existing table to recreate a new one with this option (shown as 7 in image above).
Sometimes tables with large volumes of data may get corrupted, and you may want to recreate a new table.
