EXAMPLE: Create global admin role
Even if you have several global admins in your environment, you may want to consider sapio365 RBAC to let them use sapio365 to go about their tasks because:
You can enforce ticketing on when a global admin makes a change in sapio365
Certain tasks can only be scheduled through RBAC (PowerShell based features)
You will need to set up Cosmos DB in your Azure subscription. This will centralize RBAC information to use custom roles, and it will allow you to also:
Centrally audit sapio365 actions and views by other sapio365 users, with and without roles
Share grid comments or annotations with other sapio365 users
Your global admins can then sign into a Standard session and select their role.
Create the role

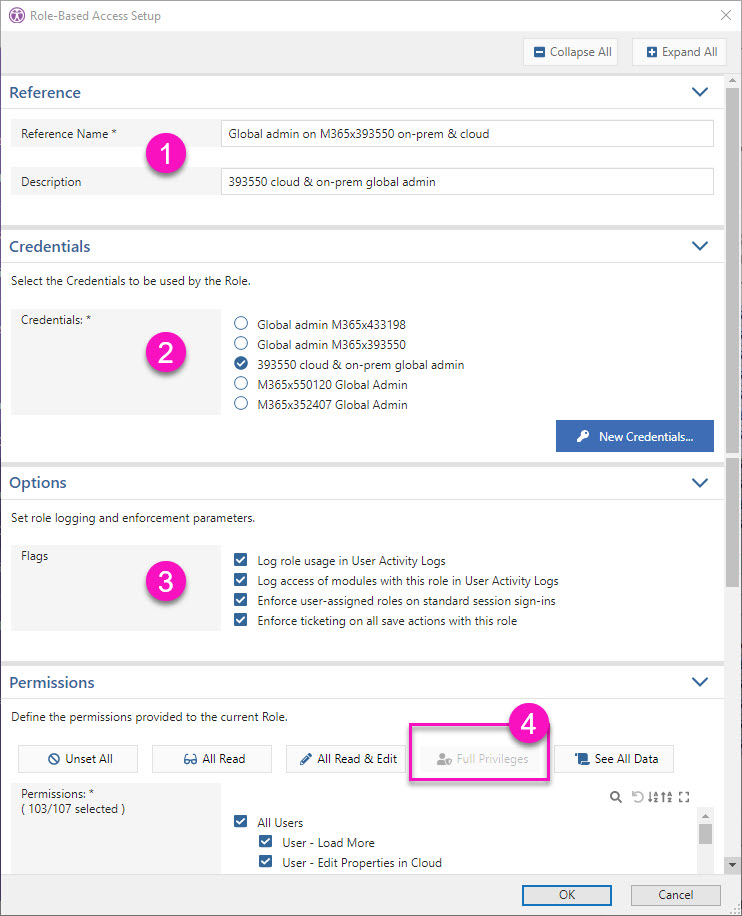
Step 1 - Give the role a name and description.
Step 2 - Choose a set of credentials or create a new one.
Step 3 - Check all flags in order to audit usage, enforce role usage and adding a ticket number when saving changes.
If you want to prevent your global admins from using sapio365 Advanced sessions (ie. without RBAC), you can limit access to the registered app sapio365 in your Azure AD to only the RBAC-dedicated service account used in the credentials.
Step 4 - Click on ‘Full privileges’ to include all permissions.
Create and add scopes
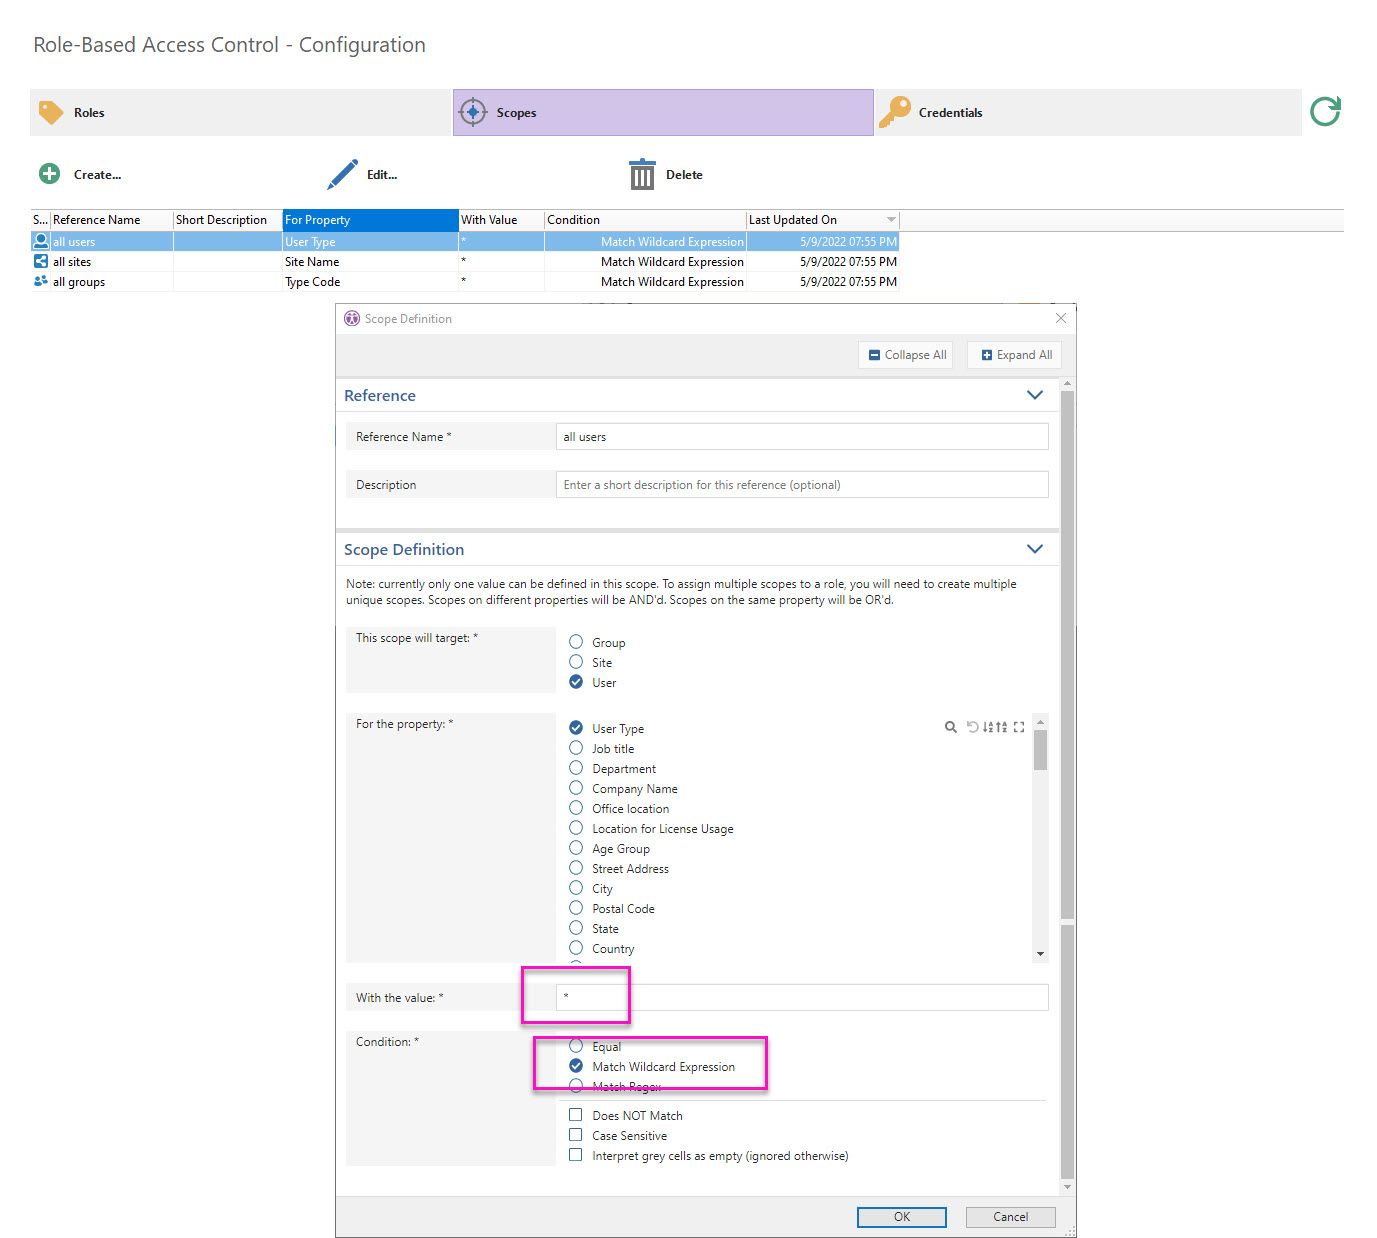
Since a global admin role needs all access to users, groups and types, we need to add all 3 types.
The image below shows how to set it up for users as the scope target.
Use any property for the scope definition. In this case, it’s ‘User Type’.
Assign a wildcard value using an asterisk *.
Repeat for sites and groups.
Select the global admin role you created and assign all 3 scopes (learn more about scopes).

Assign users or groups
Select the global admin role and assign users directly or through their group membership (learn about assigning delegated users).
