
This job is available in the Usersview.
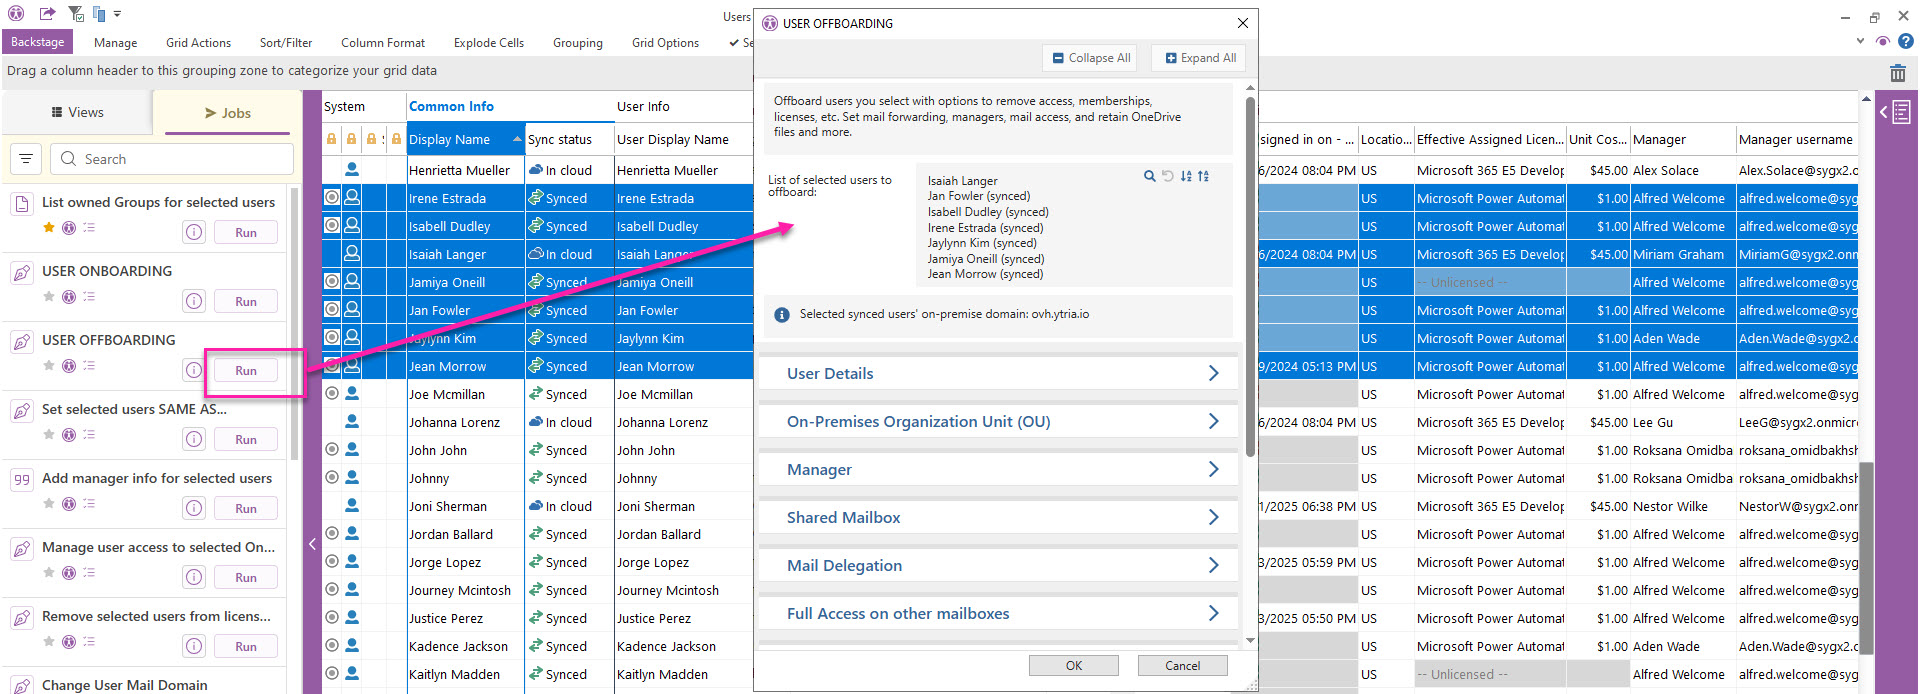
Offboard synced and cloud users you select with options to remove access, memberships, licenses, etc. Set mail forwarding, managers, mail access, and retain OneDrive files and more.
How to run the job
-
In Users, select the users you want to offboard, and run USER OFFBOARDING from the Jobs panel on the left.
For synced accounts, you must load on-prem data before running the job.
-
Select offboarding options (see the table below for details).
-
When the job is finished, you’ll see a result summary, including errors. And an Excel report will be generated with tabs for each options showing what was changed.
Click > See options and details in the Features column of the table that follows for more information and a screenshot of the section.
Offboarding Options
|
Section |
Features |
|
|---|---|---|
|
1 |
Disable, Revoke and Reset Password
|
Block access, change the password, set up mailbox litigation hold and append a prefix to the display name of the users you offboard. Resetting password for synced accounts is at on-prem Active Directory level only. See options and details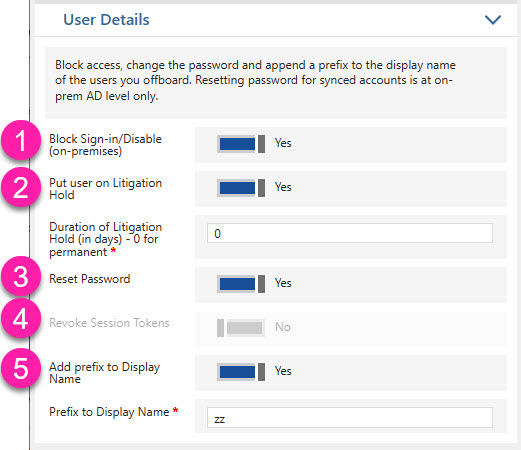
1 - Block Sign-in/Disable (on-premises)
2 - Set Mailbox on Litigation Hold
Set the number of days for the mailbox litigation hold you want to apply. To apply a permanant litigation hold, enter '0'. 3 - Reset Password
Session tokens will be revoked if you reset the password. 4 - Revoke Session Tokens
Revoke users' Microsoft Entra ID refresh tokens. 5 - Add prefix to Display Name
Set characters to the start of the users' display name. |
|
2 |
Move to another OU (hybrid)
|
Move accounts to an existing or to a new On-Premises Organization Unit (OU). See options and details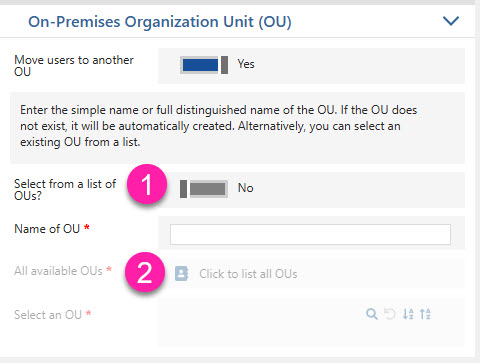
Enter the simple name or full distinguished name of the OU. If the OU does not exist, it will be automatically created. Alternatively, you can select an existing OU from a list. 1 - Decide if you want to:
2 - All available OUs
Click the icon to load the list of OUs and then select one.
|
|
3 |
Assign a Manager
|
Verify whether selected users have a manager assigned. You can assign a manager only to users without one, or replace the existing manager for all selected users with a new assignment. See options and details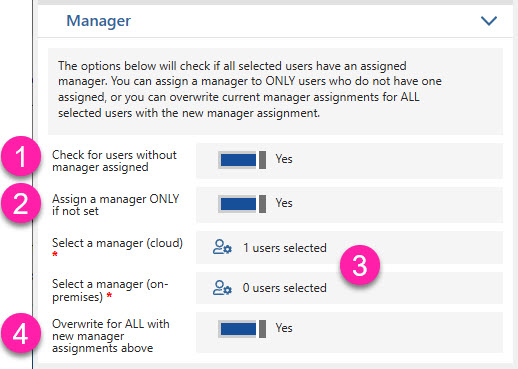
1 - Check for users without manager assigned
Verify whether selected users have a manager assigned. The result will be exported in the final report. 2 - Assign a manager only if none is set
Set to Yes to assign a manager only to selected users who don’t already have one. 3 - Select a manager
Click the icon to open the cloud or on‑prem directory and choose the manager to assign to cloud and synced users. 4 - Overwrite all with new manager assignments
Set to Yes to replace the current manager for all selected users with the manager chosen above.
|
|
4 |
Convert to Shared Mailbox
|
Convert selected users' Exchange Online mailboxes to shared mailboxes, enable archiving and set email forwarding. The options in this category only apply to selected users with an existing mailbox. See options and details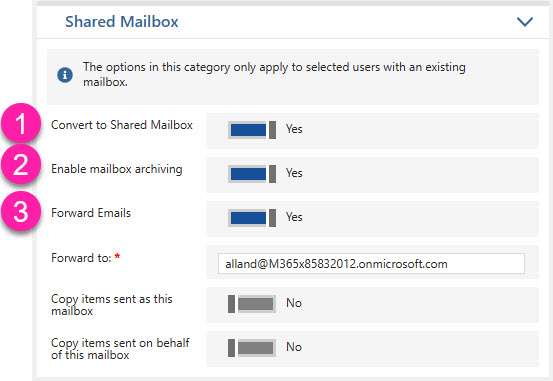
1 - Convert to Shared Mailbox
Set to Yes to convert selected users' mailboxes to shared. 2 - Enable mailbox archiving
Set Mailbox Archiving for selected users' mailboxes. 3 - Set email forwarding
Set email forwarding for selected users' mailboxes.
|
|
5 |
Set Mailbox Access
|
Delegate Full Access to the mailboxes of the users you offboard. You can delegate access to the assigned manager, to another user or to a security group. The options in this category only apply to selected users with an existing mailbox. See options and details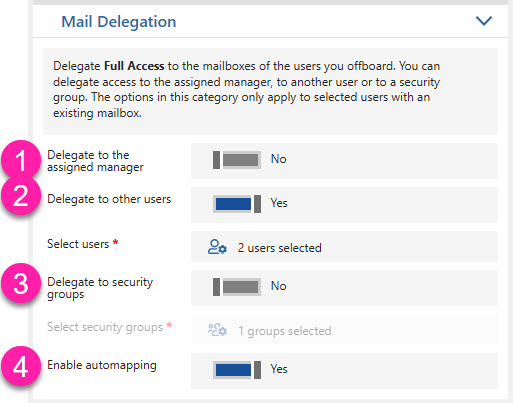
1 - Delegate to the assigned manager
Add the assigned manager as a mailbox delegate with Full Access. You must set Check for users without manager assigned to Yes to have this option enabled. 2 - Delegate to other users
Select users from the directory to add them as mailbox delegates with Full Access. 3 - Delegate to security groups
Select security groups from the directory to add them as mailbox delegates with Full Access. 4 - Enable automapping
Set to Yes to have the selected delegates’ Outlook automatically open the offboarded users’ mailboxes (Full Access with auto-mapping enabled). |
|
6 |
Transfer Full Access to other mailboxes
|
Remove selected users' existing Full Access rights to other mailboxes and transfer them to others. You can copy them to the assigned manager, to other users or security groups. The options in this category only apply to selected users with an existing mailbox. See options and details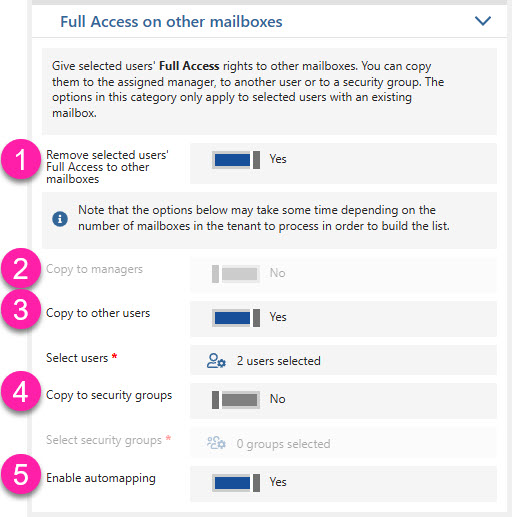
Note that the options below may take some time depending on the number of mailboxes in the tenant to process in order to build the list. 1 - Remove selected users' Full Access to other mailboxes
Find which mailboxes the offboarded users can open with Full Access and remove their Full Access from those mailboxes. 2 - Copy to managers
Add the assigned manager as a mailbox delegate with Full Access for those mailboxes. 3 - Copy to other users
Select users from the directory to add them as mailbox delegates with Full Access for those mailboxes. 4 - Copy to security groups
Select security groups from the directory to add them as mailbox delegates with Full Access for those mailboxes. 5 - Enable automapping
Set to Yes to have the selected delegates’ Outlook automatically open those mailboxes (Full Access with auto-mapping enabled). |
|
7 |
Set Out-of-office replies
|
Configure the same automatic Out-of-office reply messages for all offboarded users with mailboxes. The options you set here will be applied to ALL offboarded users with an existing mailbox. See options and details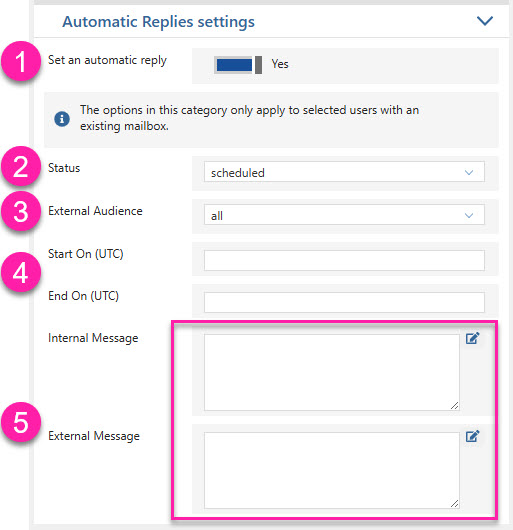
1 - Set an automatic reply
Set to Yes to enable Out-of-office replies for all offboarded users. 2 - Status
Select from:
3 - External Audience
Select from:
4 - Schedule start and end dates
Status must be set to scheduled to enable this option. Set Start On (UTC) and End On (UTC) dates for the auto reply messages to take effect. 5 - Set an Internal and External message
The messages you set here will be applied to all offboarded users with an existing mailbox. Click on the pencil icon to create a message in the rich text editor.
|
|
8 |
Remove Licenses
|
Remove all assigned licenses from all selected users. Note that group-based license assignments are not affected. You must remove users from the relevant groups to release licenses. See options and details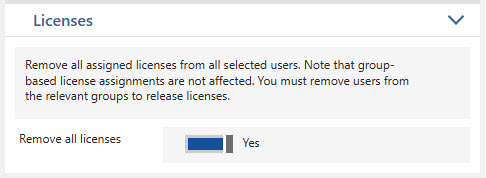
Set to Yes to remove directly assigned licenses. To remove group-assigned licenses, you must remove the users from the groups. |
|
9 |
Remove Admin Roles
|
Remove all assigned Microsoft 365 administration roles from all selected users. See options and details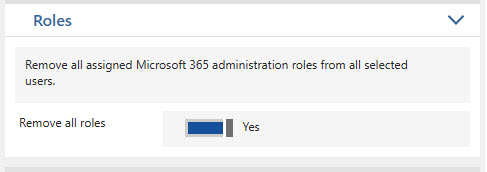
Set to Yes to remove directly assigned Entra roles. To remove group-assigned roles, you must remove the users from the groups. |
|
10 |
Remove from Groups
|
Remove users from all groups or just certain types with the options below. Note that synced users will be removed from the relevant on-prem groups. See options and details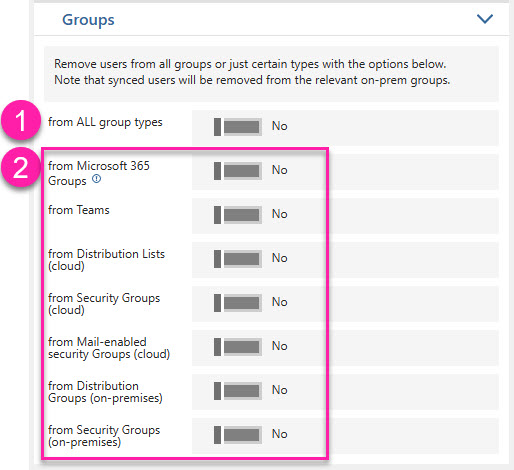
1 - Remove from all groups
Set to Yes to remove offboarded users from every group in Entra and on-premises (hybrid). 2 - Remove from certain group types only
Select from the following options:
|
|
11 |
Download OneDrive
|
Download and copy offboarded users’ OneDrive content to a SharePoint site, another OneDrive, or a new Teams channel folder named after each user. See options and details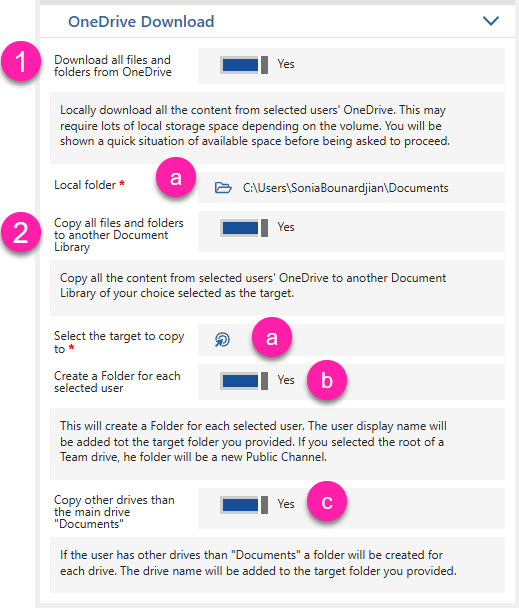
1 - Download all files and folders from OneDrive
Locally download all content from the selected users’ OneDrives. This may require significant local storage, depending on the total volume of data. You will see a quick summary of available space before being asked to continue. a) Click the folder picker icon to choose the local destination folder. 2 - Copy all files and folders to another Document Library
Copy all content from the selected users’ OneDrives to a target OneDrive or site document library of your choice. a) Select the destination target by clicking the picker icon. b) Set Create a folder for each user to Yes to create a separate folder for each selected user. If you created a new destination subfolder in the previous step, the user’s display name will be appended to that folder name. If you selected the root of a team drive, a new public channel will be created instead. c) Set Copy other drives than “Documents” to Yes to include any additional drives the user has (for example, the Preservation Hold Library). A separate folder will be created for each drive, with the drive name appended to the target folder name. |
|
12 |
Add Comment and Save Config
|
Add a grid comment in sapio365 for each offboarded user and make the current option selection sticky so that you don’t have to set it again. See options and details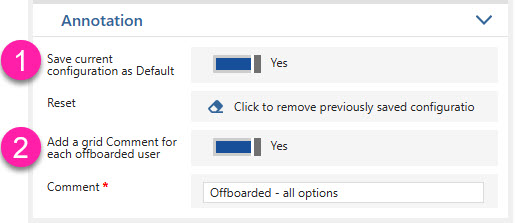
1 - Save current configuration as Default
Set to Yes so that the options you’ve selected stay sticky. You can reset everything by clicking the eraser icon ‘Click to remove previously saved configuration’. 2 - Add a grid Comment for each offboarded user
Set to Yes to enter text that will be added as a comment in the grid for each offboarded user.
|