sapio365 runs the tasks and reports you schedule there with the Windows Task Scheduler. As such, sapio365 only lets you set basic Windows Task Scheduler parameters like frequency, start data and time, etc. This page explains available scheduling and configuration options when scheduling a sapio365 task or job.
sapio365 does NOT replace the Windows Task Scheduler
The Windows Task Scheduler has a plethora of parameters and only the most basic scheduling settings are managed by sapio365.
After scheduling a task or report in sapio365, you can set and adjust parameters directly in the Windows Task Scheduler.
You can schedule:
-
Jobs: These are reports and workflows that gather data and make changes.
-
Quick GridViews: These are linear reports based on available views in a module and submodules.
-
Usage Reports: These are combinable Microsoft 365 usage reports based on available views.
-
Summary Reports: These are printable (PDF) summaries with counts and data tables linked to views.
How to schedule a task or report
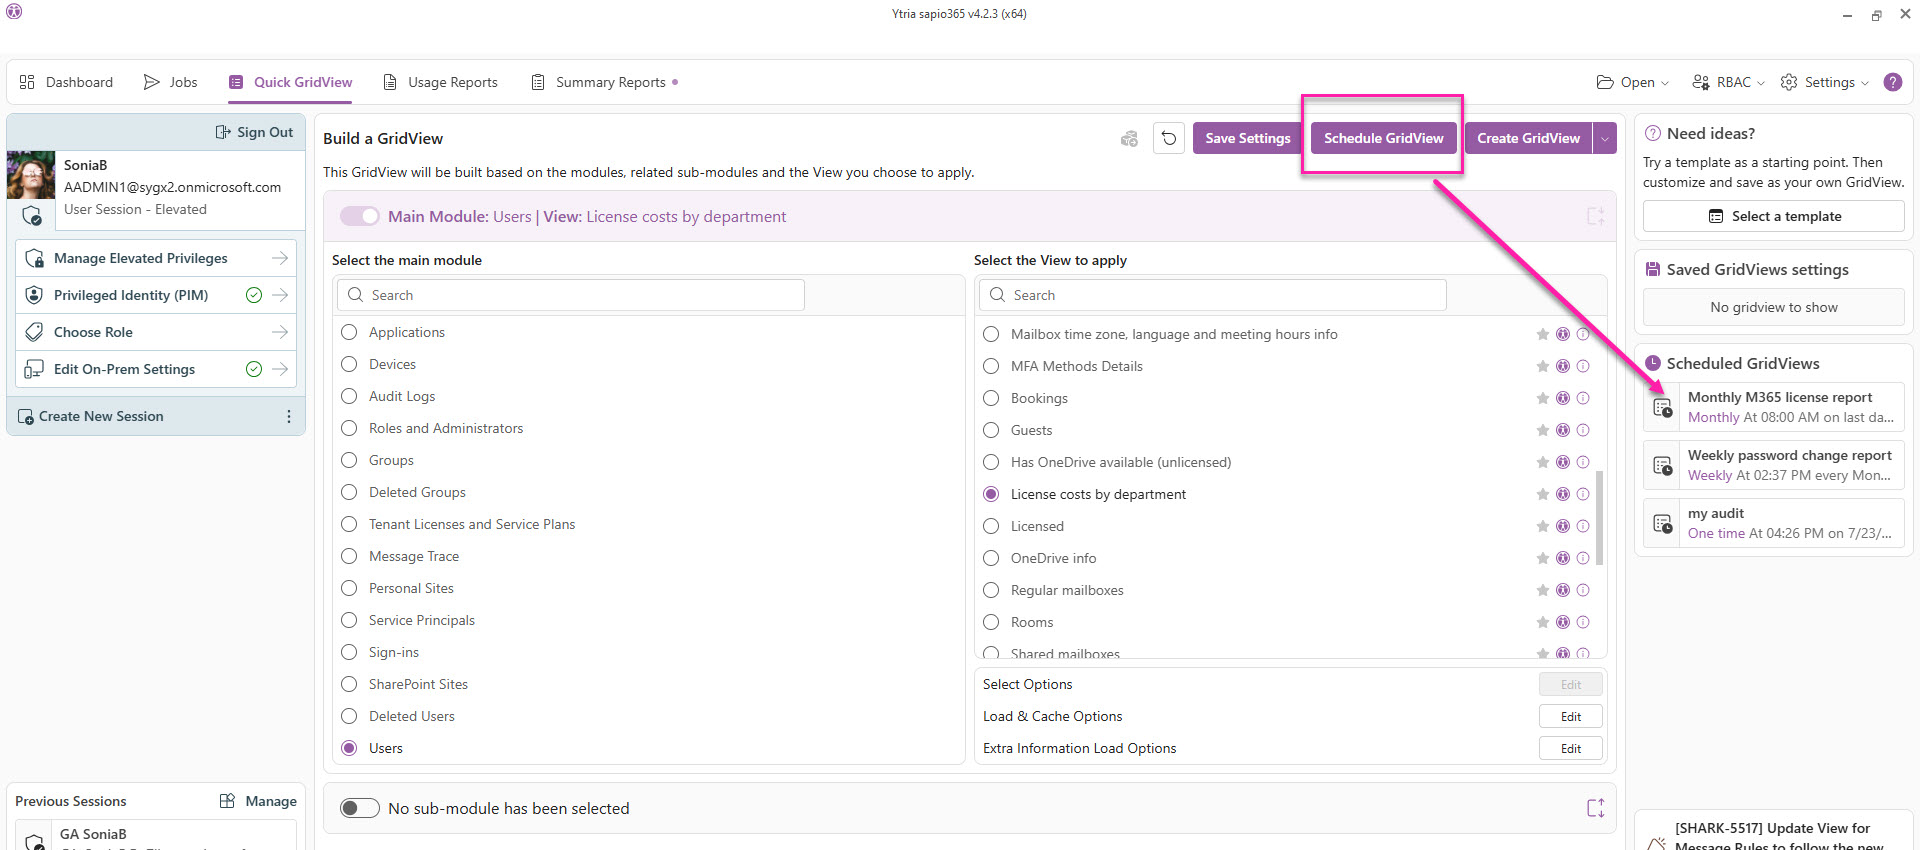
In this example, we’ll schedule a monthly report from a Quick GridView based on the view License costs by department as shown in the image above. The same steps apply for Jobs, Usage Reports and Summary Reports.
-
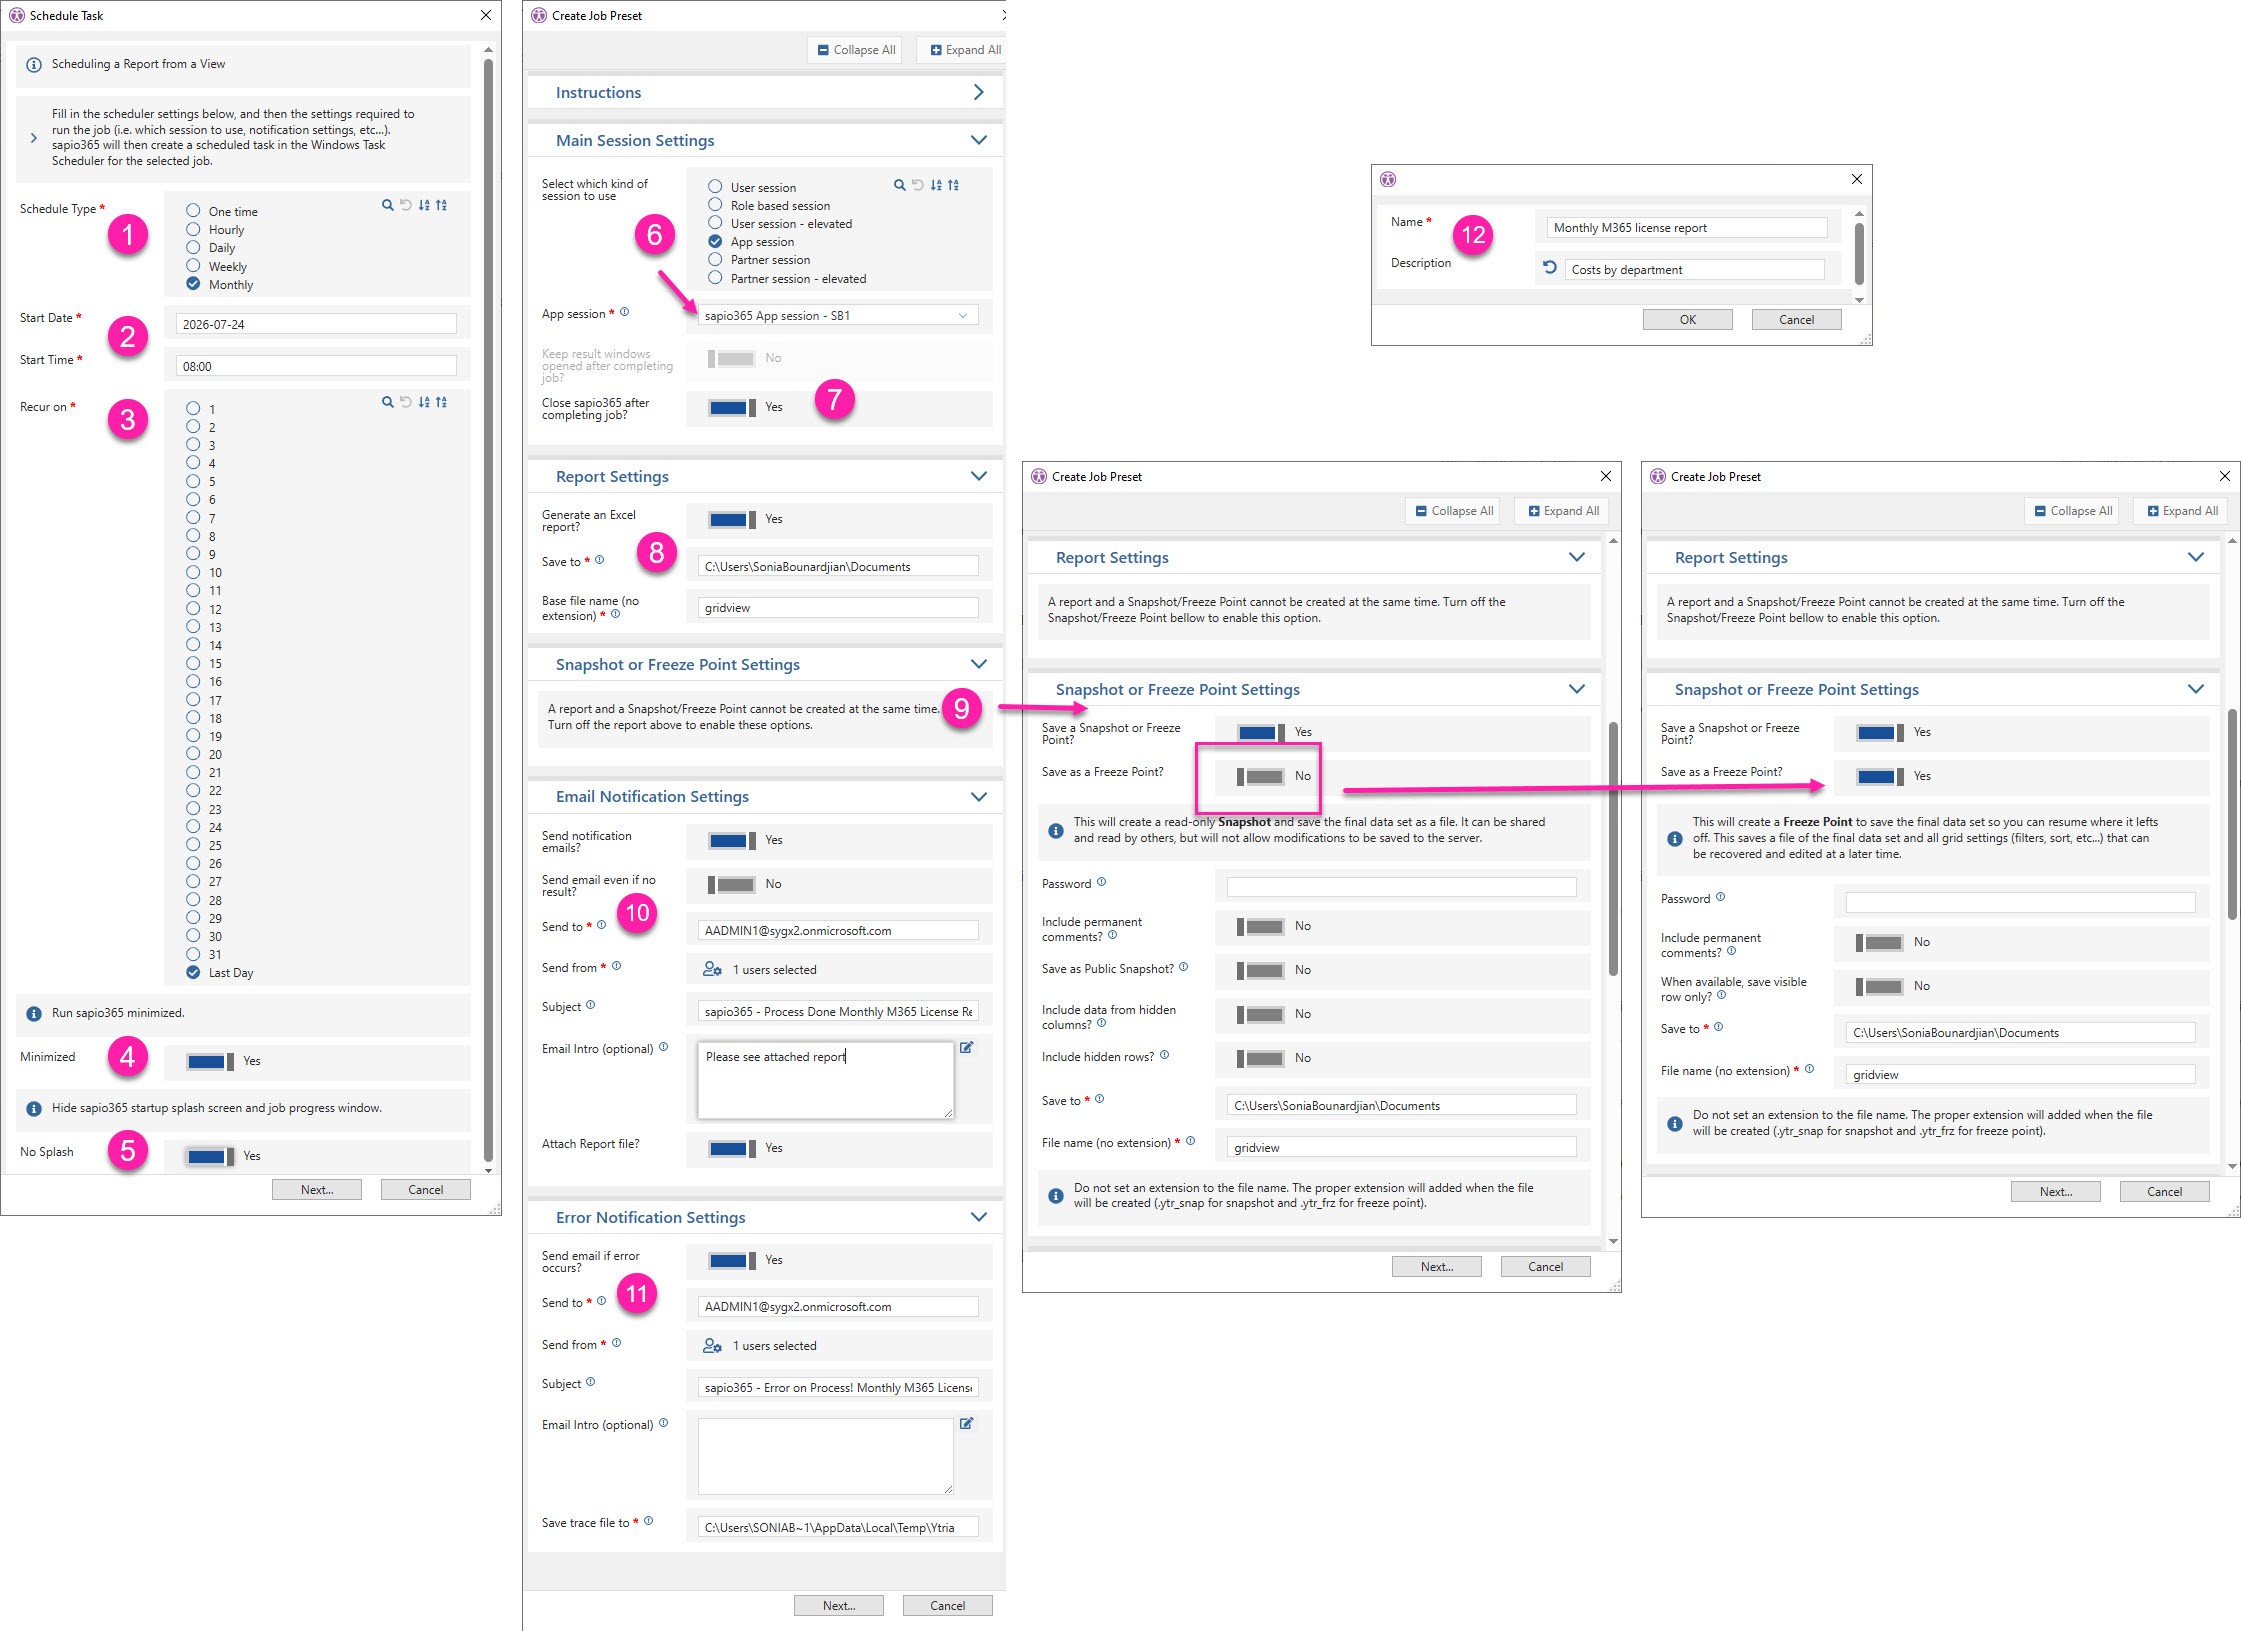
First set some scheduling parameters. These will be set in the Windows Task Scheduler. Start by selecting the Schedule Type (frequency).
-
Set a start date and time.
-
Set a recurrence pattern to run it:
-
Hourly: every x number of hours
-
Daily: every x number of days
-
Weekly: the day of the week
-
Monthly: the day of the month
-
-
Run sapio365 minimized: set it to Yes if you want to avoid seeing sapio365 windows.
-
No Splash: set it to Yes if you want to avoid seeing any progress dialogs. Click Next.
-
Next, create a preset starting with the sapio365 session to run the report. If you have created several types of sapio365 sessions, you’ll see them listed here.
-
Keep ‘Close sapio365 after completing job?’ set to Yes to avoid any freezing issues due to invisible hung processes.
-
By default, an Excel report will be generated. In Reports Settings, set ‘Generate an Excel report’ to No, only if you prefer getting a Snapshot or Freeze Point.
-
Save to: this is the location of the saved Excel file.
-
Base file name: this is the name of the file.
-
-
The Snapshot or Freeze Point Settings section will show related options only if ‘Generate an Excel report’ is set to No.
-
Set Email Notification Settings:
-
Send Notification email: set to Yes to enable the settings in the section.
-
Send email even if no result: set to Yes only if you want to know that the job ran regardless of the result (ex. a filtered view where everything is filtered out).
-
Send to: Provide valid email addresses separated by a comma.
-
Send from: Select a user account with valid email address. By default, this is set to the current session’s user account.
-
Subject line: Modify the subject of the email.
-
Email intro: Add an introduction in the email.
-
Attach report file: Set to Yes to attach the Excel file or the sapio365 Snapshot or Freeze Point file to the email.
-
-
Set Error Notification Settings if you want to be emailed if there’s run issue, and then click Next.
-
Enter a Name and Description for the automated report. The name you provide will be listed in the Scheduled tasks list on the right.